https://ospreypublishing.com/thisweekhistory/

Little Big Horn (25th June)
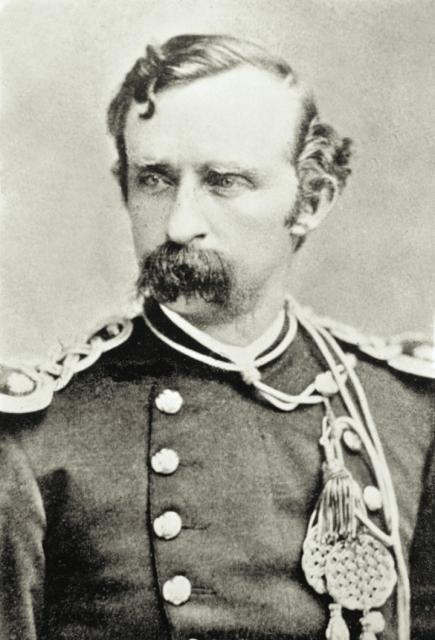
The battle of Little Big Horn, known to many as ‘Custer’s Last Stand’, was in the words of General Terry ‘a sad and terrible blunder.’ The operation’s aim was to force the Indians back on to the reservations and back under Federal control. The Americans planned to do this by encircling the Indians with three columns of troops, led by Generals Crook and Terry, and Colonel Gibbon. The campaign of Little Big Horn, however, went wrong from the beginning. The column led by General Crook was stopped almost immediately, and after a severe mauling fell back to its supply base. Custer, commanding the 7th US Cavalry Regiment under the leadership of Terry, disobeyed his orders and followed a trail left by a large number of ponies towards the Little Big Horn. On the morning of 25 June he encountered a large camp of Indians. Splitting split his command into three groups and failing to asses the strength of the Indian force Custer attacked; with disastrous consequences. By 6pm 210 troopers of the US 7th Cavalry regiments and Custer were dead. On 26 June the Sioux and their allies followed up their success by travelling upstream and attacking Reno, Custer’s second-in-command. Reno’s command, the remainder of the regiment, suffered a further 47 casualties. General Terry and Colonel Gibbon reached the remains of the camp the following day.
Further reading
Campaign 39: Little Big Horn 1876 Custer's Last Stand (extract below) details the entire campaign, focussing on Custer’s Last Stand, and aims to set aside the myths that have grown up around this famous incident, and retell the events accurately.
Men-at-Arms 63: The American Indian Wars 1860-1890 covers the participants on both sides of this war. For more information on the Indians, Men-at-Arms 163: The American Plains Indians (extract below) is about the plains Indians in general, and Men-at-Arms 344: Tribes of the Sioux Nation (extract below) details the Sioux Indians, who comprised the majority of the warriors who fought the US Cavalry at Little Big Horn. Warrior 4: US Cavalryman 1865-1890 and Men-at-Arms 168: US Cavalry on the Plains 1850-90 are studies of the US army during this period on the plains.
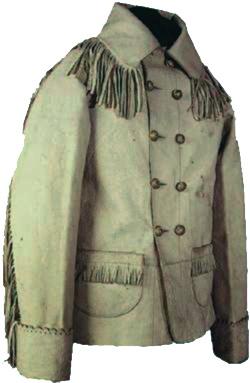 Skórzana kurtka Custera, ok. 1875 r.
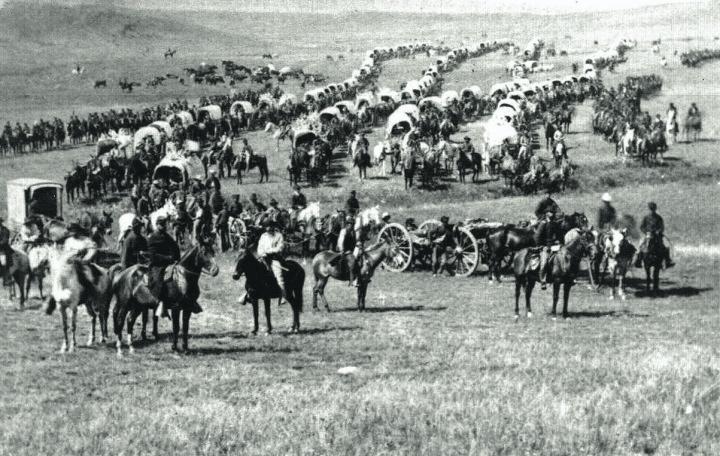 Oddział gen. Custera podczas wyprawy przeciwko Siuksom w 1874 r.
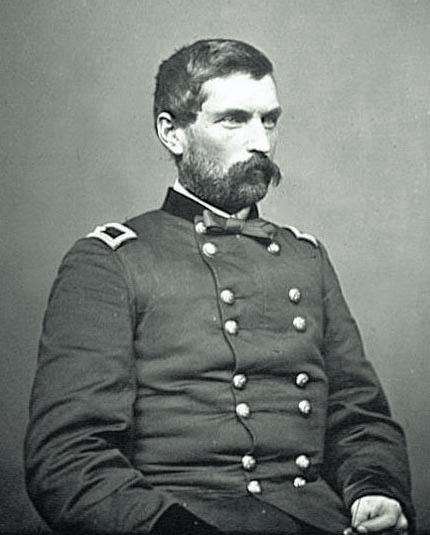 Pułkownik John Gibbon
Custer’s last stand
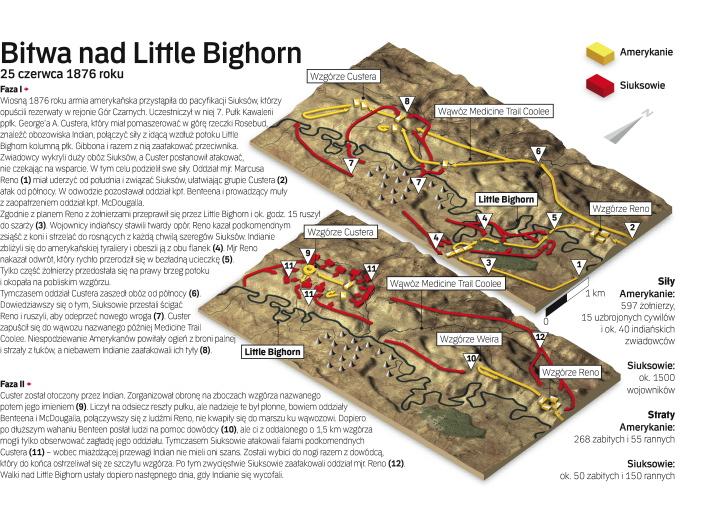
Immediately after the two Custer battalion wings converged on Calhoun Hill, the left wing moved north along battle ridge to investigate any northern ford, and confirm the location of the non-combatants. Warriors attempting to interfere with Yates’ movement were suppressed, and Yates’ troopers eventually moved, with little resistance, north-west along the Cemetery Ridge. Custer and his staff probably accompanied Yates’ wing in this reconnaissance. They rode about a mile beyond Custer Hill, within sight of the north ford and Squaw Creek. Across the river, thousands of Indian non-combatants were seeking refuge. Custer would need the additional 300 men from Benteen and the pack train before he could do more. The left wing then retraced its steps, moving along the flats, back toward Cemetery Ridge.
While Custer and the left wing were beyond Cemetery Ridge, Crazy Horse and his mounted following crossed the Little Big Horn River at the mouth of the Deep Ravine, just north of the village. They ascended through the Deep Ravine and crossed the mile-long Battle Ridge far to the north of the right wing, then took a covered position in the ravines along the east side of the ridge and began to infiltrate towards the right wing. With Gall approaching Calhoun Hill from the south, the Cheyenne leader, Lame White Man, to the west, and Crazy Horse now to the east, the encirclement was complete.
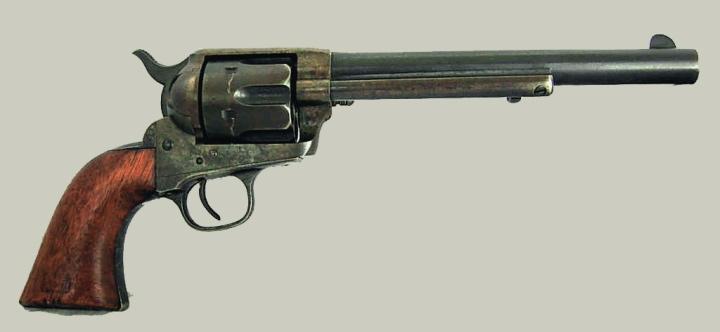 Rewolwer Colt Single Action wz. 1873
It was about this time, 4.50pm, that Capt. Weir departed Reno Hill with D Company. Custer’s left wing returned to Cemetery Ridge and deployed in skirmish formation, with E Company taking up a position near Custer Hill and F Company just below it. Indian aggressiveness intensified as their numbers rapidly increased. They began to close in from all directions. Cheyenne war chief Two Moons and Runs the Enemy attempted to stampede the grey horses (E Company) near Cemetery Ridge, but were deterred by carbine fire. The Custer battalion waited, looking south-east for Benteen. Calhoun and Keogh were on Calhoun Hill, Custer, Yates and Smith on Cemetery Ridge. The skirmishing continued for 20 or more minutes, as the hostiles continued to infiltrate.
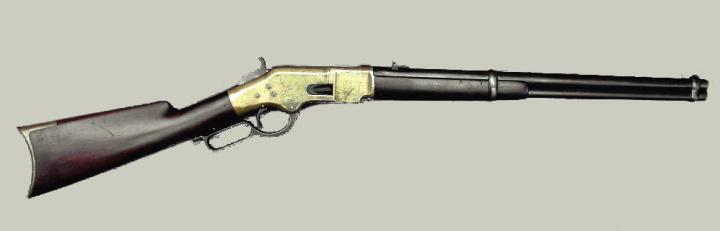 Karabin Winchester wz. 1866
Captain Keogh, Custer’s right wing commander, had deployed three companies (L, C and I) on Calhoun Hill in the standard US Cavalry textbook formation. As warriors continued to arrive from the Reno fight, L company became more heavily engaged from the west and south. The horses were in jeopardy, and their holders were taking fire from Calhoun Coulee. Keogh dispatched C Company, led by Lt. Harrington, to charge west into Calhoun Coulee and dislodge a small group of warriors who were threatening the horses and men. The charge failed because the troops were exposed to intense fire when they came into range of Greasy Grass Ridge and other positions. The survivors fled back to Calhoun Hill and were immediately pursued by mounted warriors led by the Cheyenne chief Lame White Man.
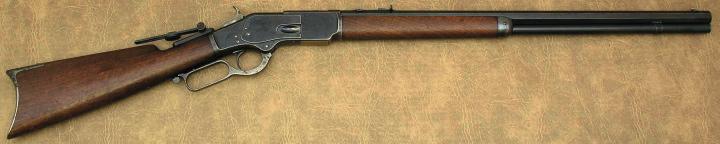 Karabin Winchester wz. 1873
Warriors to the south, following Gall, seized the opportunity. They rushed up the southern approaches to Calhoun Hill in an intense blaze of rifle fire. This sudden shock triggered a collapse of the position, since a few troopers panicked and attempted to flee, encouraging many more warriors to surge forward. They charged in, mounted and on foot, from several directions, engaging in ferocious hand-to-hand combat. Some soldiers were cut down fleeing, others grouped together and made easy targets for the warriors with bows. Lt. Calhoun was killed in one of these small groups. Some of the soldiers on horseback fled the 600 yards towards Keogh’s position, but most of those on foot were ridden down.
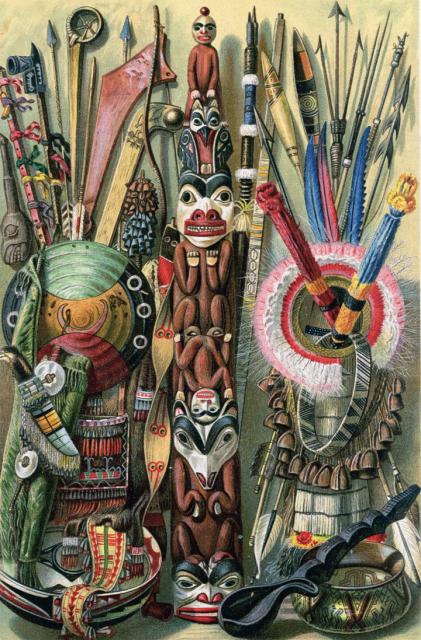 Indiańska broń i ozdoby, litografia z końca XIX w.
As Calhoun’s company collapsed, engulfed by Sioux and Cheyenne Warriors, Keogh’s I Company deployed to engage the pursuing warriors. They were unable to react fast enough, and were shaken by the sudden turn of events. When the survivors fled towards I Company, tactical cohesion disintegrated there also. Crazy Horse and his following were encroaching from the ravine north-east of Keogh, in perfect position to attack. They swept in on all three companies from the east, as the other warriors pursued C and L Companies from the south and west. The entire element was surrounded and cut to pieces.
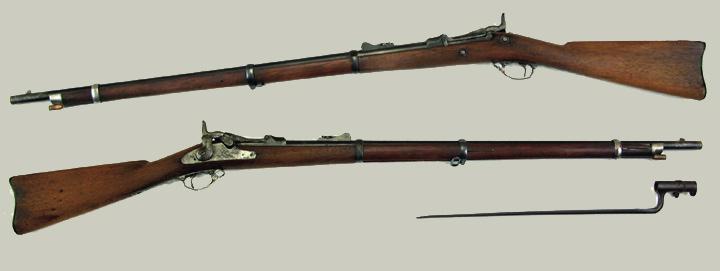 Karabin Springfield Trapdoor wz. 1873
The left wing was also under some pressure as the hostiles closed in. Pinned, and out of supporting fire range, Custer must have watched in horror as events rapidly unfolded before him, less than a mile down the ridge. There was little opportunity to react, for within a matter of minutes the right wing had disintegrated.
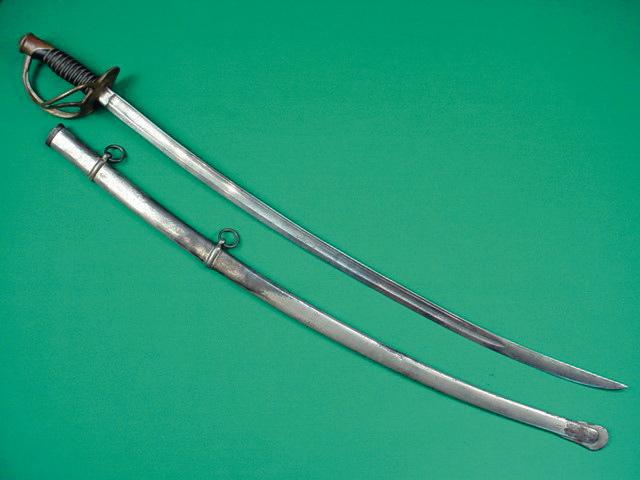 Amerykańska szabla wz. 1860
Absolute chaos reigned as more frenzied warriors surged forward and terrified troopers tried to flee. More soldiers bunched together and resisted before being killed or forced to run away. Captain Keogh was killed with a small group of his men on the eastern slope of the ridge. The fight moved along the ridge from Calhoun Hill to Custer Hill. Over half the battalion was gone; the remainder were surrounded and outnumbered.
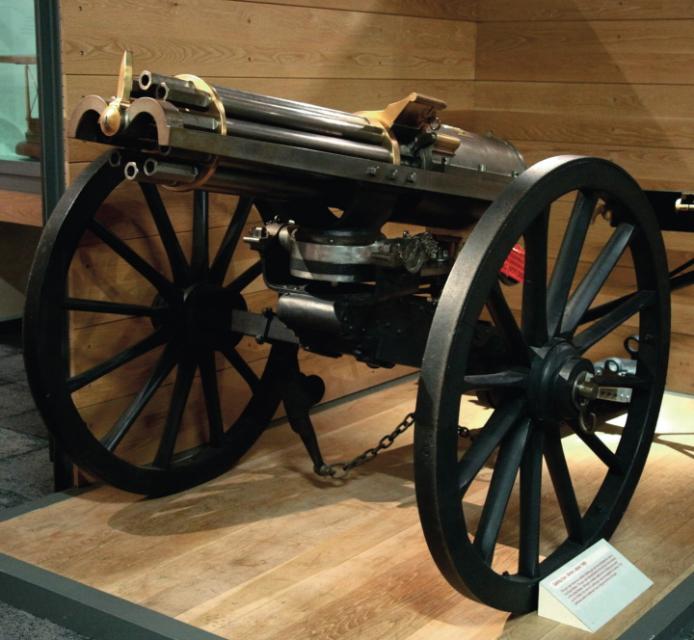 Kartaczownica Gatlinga wz. 1865
The left wing was able to maintain tactical cohesion as they deployed to receive about 20 left wing fugitives. A skirmish line from E Company opened fire on the pursuing Indians, checking the warriors’ advance along the ridge. With barely more than 100 soldiers left, E and F companies were surrounded near Cemetery Ridge and Custer Hill. They were now outnumbered by as many as 15 or 20 to one and there was no sign of Reno or Benteen.
Both companies made their way towards the top of the hill. It was a poor position, with thousands of warriors moving in for the final attack. Exposed troopers were picked off, while groups of mounted warriors stampeded many of the Army horses. The Sioux managed to concentrate on the weakest points. They continued to attack by fire, to pin and suppress. Other warriors remained mounted and mobile.
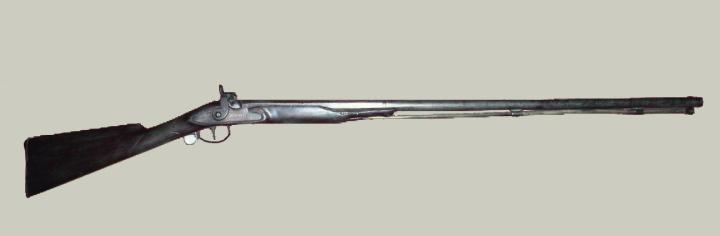 Karabin myśliwski Ketland, używany także przez Indian, ok. 1840 r.
The surviving members of Custer’s command hunkered down behind dead horses as Indians further encroached on their position. Ammunition shortages could not have been a critical concern, for most Indian accounts testify that captured cartridge belts had ample rounds still on them. Custer may have been shot at this point, for a mounted foray was attempted without him. With the greater threat coming from the direction of Calhoun Hill to the south, E company mounted what horses were still available, and made a dash toward the west. The E Company commander was left behind, dead or wounded on the hill. Whether to escape or to drive off enfilading snipers, the manoeuvre failed. Thousands of warriors diverted their movements into the Deep ravine.
 Strzelba Pedersoli używana przez traperów i Indian, początek XIX w.
About 50 men (F Company and right wing survivors) remained on Custer Hill. The numbers dwindled as Indian firepower took its toll. Finally a group of 15-20 dismounted soldiers desperately attempted to flee toward E Company in the Deep Ravine. They were shot or ridden down, and their bodies lay scattered from the hill to the upper portions of the ravine.
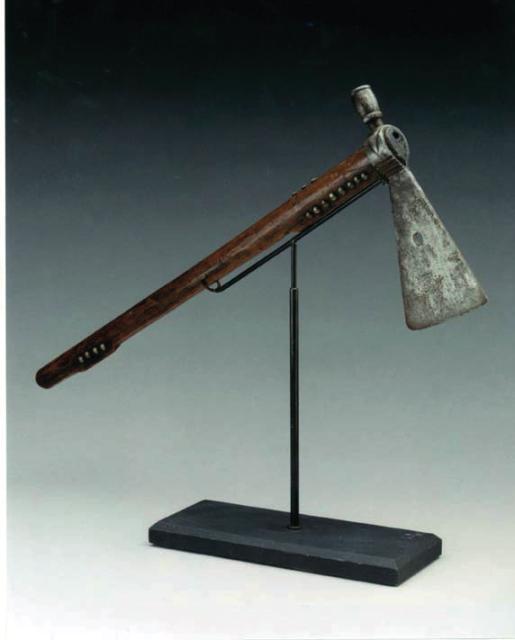 Tomahawk Indian prerii, XIX w.
The final event was an anti-climax to the battle. Those soldiers on Custer Hill who were wounded or did not attempt to flee were overrun by the victorious Sioux and Cheyenne. It is doubtful that any of Custer’s group were left standing as warriors closed in to finish them off. There was some resistance, as a few warriors were killed in the final hand-to-hand melee.
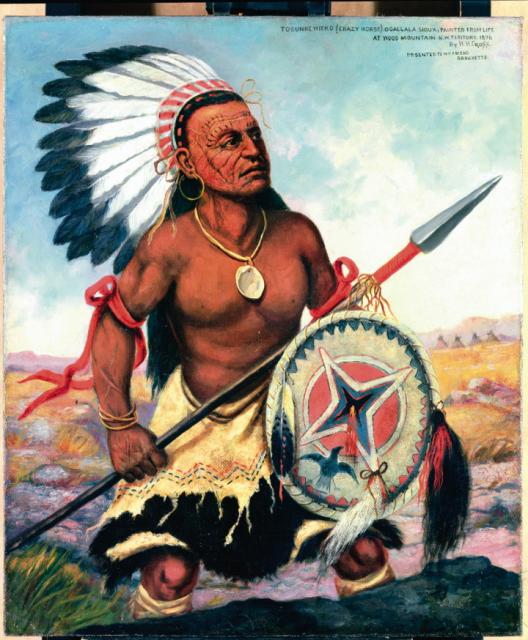 Szalony Koń, wódz plemienia Oglala z grupy Siuksów, mal. Henry H. Cross
Custer was either dead or dying by this time. He was found on top of a soldier, and horse, shot in the chest, and then in the left temple. On the ground next to him were 17 shells from his Remmington sporting rifle. Nearby lay his brother Tom, shot full of arrows and his adjutant Lt. Cooke. Capt. Yates and 2nd Lt. Reily, the Company F executive officer, were on the hill with about 20 other F company troopers. Lt. Algernon Smith, E Company commander, was the only man from his company found on Custer Hill. There were 42 bodies on the hill and 39 dead horses. The 210 men of the Custer battalion were all killed. By 6pm the mounted warriors were beginning to attack Weir and Benteen. Custer’s troopers were stripped and mutilated by the warriors and women who stayed behind.
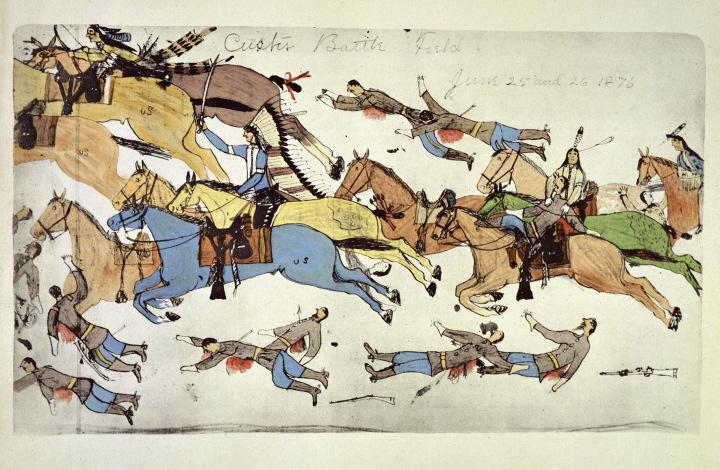
Śmierć Custera nad Little Big Horn, mal. Hans von Schmidt, 1950 r.
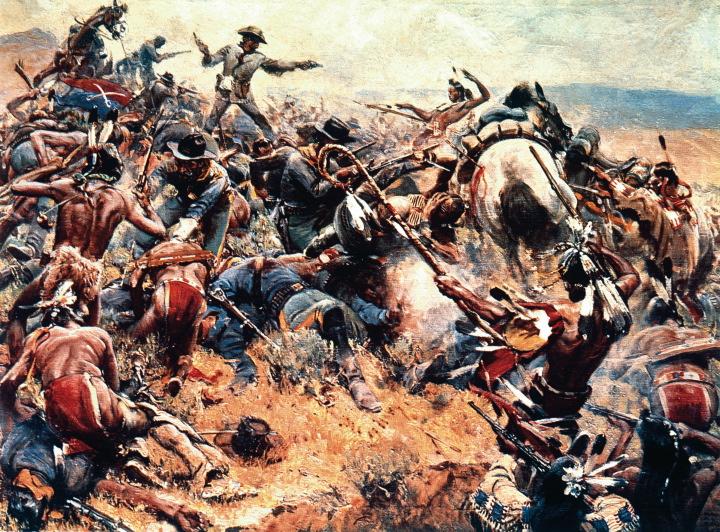
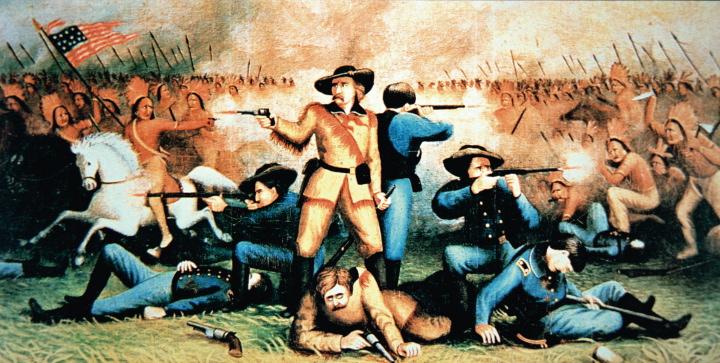 Custer otoczony przez Indian nad Little Big Horn, litografia amerykańska z końca XIX w.
An extract from Men-at-Arms 344: Tribes of the Sioux Nation
The context of Custer’s Last Stand - The 1876 campaign
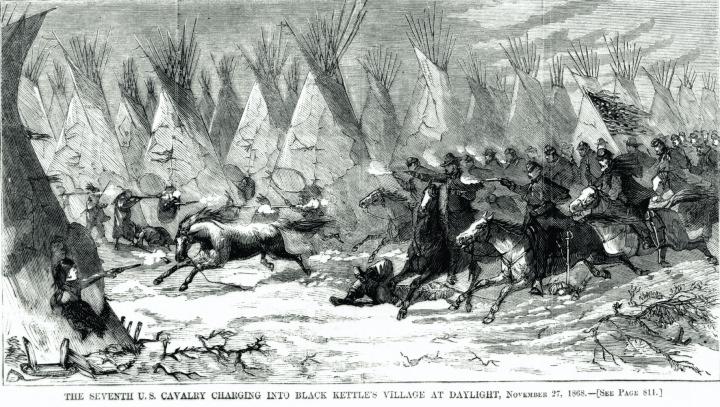 7. Pułk Kawalerii Custera szarżuje na wioskę Czejenów nad Washita River 27 listopada 1868 r.
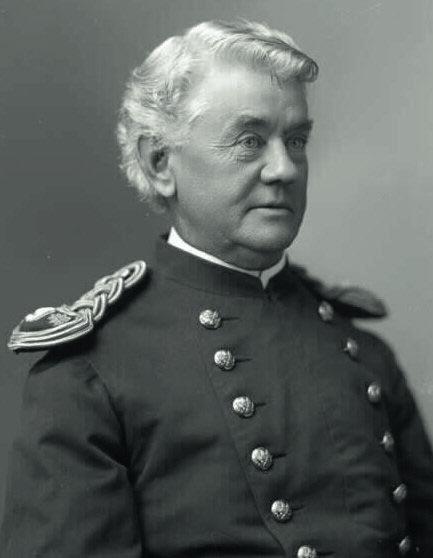 Kpt. Frederick W. Benteen
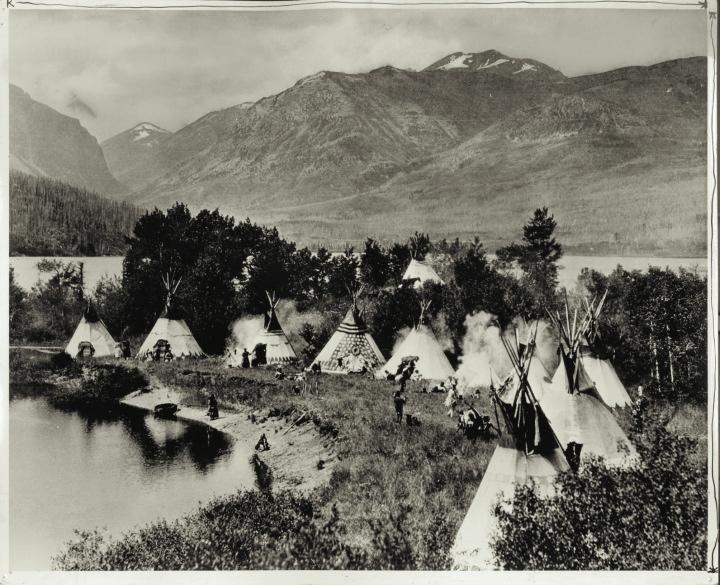 Wioska indiańska, fotografia z lat 70. XIX w.
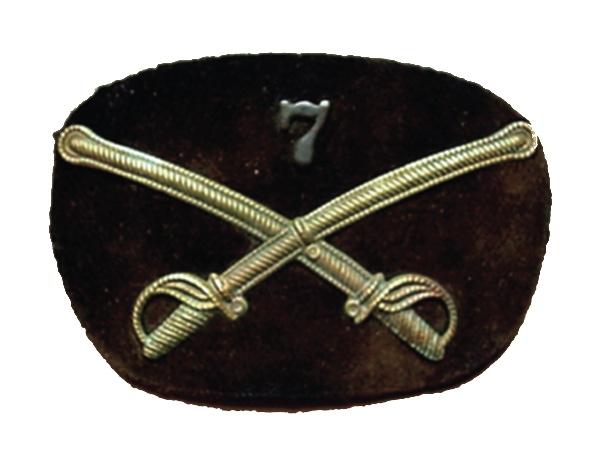 Naszywka z emblematem 7. Pułku Kawalerii
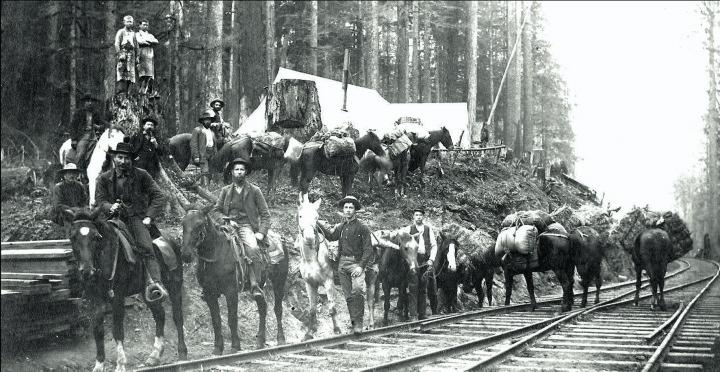 Budowniczowie linii kolejowej Northern Pacific, fotografia z 1890 r.
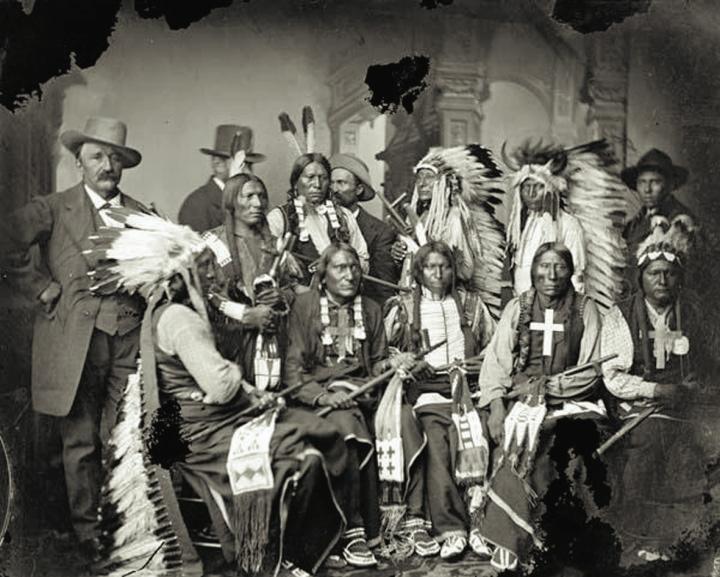 Delegacja wodzów Siuksów i Arapahów w Waszyngtonie w 1860 r.
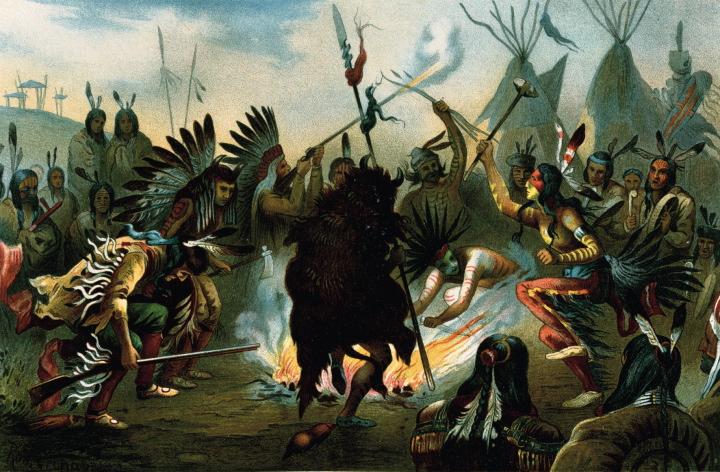 Siuksowie tańczą taniec wojenny, litografia z 1887 r.
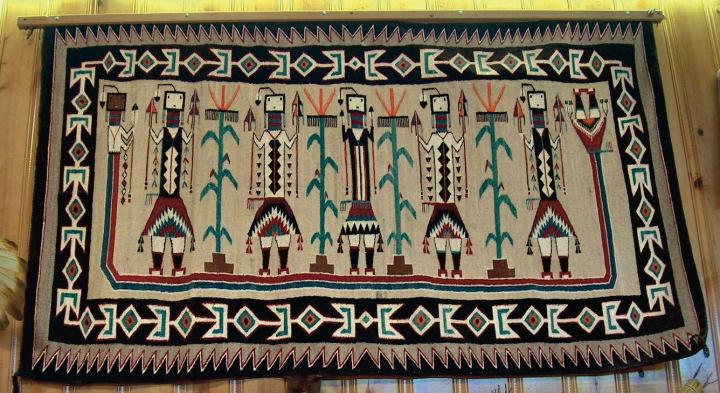 Indiańska mata z drugiej połowy XIX w.
Further reading
Campaign 39: Little Big Horn 1876 Custer's Last Stand (extract below) details the entire campaign, focussing on Custer’s Last Stand, and aims to set aside the myths that have grown up around this famous incident, and retell the events accurately.
Men-at-Arms 63: The American Indian Wars 1860-1890 covers the participants on both sides of this war. For more information on the Indians, Men-at-Arms 163: The American Plains Indians (extract below) is about the plains Indians in general, and Men-at-Arms 344: Tribes of the Sioux Nation (extract below) details the Sioux Indians, who comprised the majority of the warriors who fought the US Cavalry at Little Big Horn. Warrior 4: US Cavalryman 1865-1890 and Men-at-Arms 168: US Cavalry on the Plains 1850-90 are studies of the US army during this period on the plains.
Custer’s last stand
Custer’s mission was to force the warriors to return to the reservation. His most effective method of achieving this was to destroy their homes and property, or capture the non-combatants and hold them hostage. The non-combatants were the primary targets. Lt. Godfrey understood Custer’s expected strategy as ‘ … attacks on the families and the capture of the pony herds were in that event counted upon to strike consternation into the hearts of the warriors, and were elements for success.’ According to Trumpeter Martin, Custer had expressed this intention to his subordinates before descending the Medicine Tail Coulee. With Benteen and the pack train present, he would have sufficient numbers to capture them.
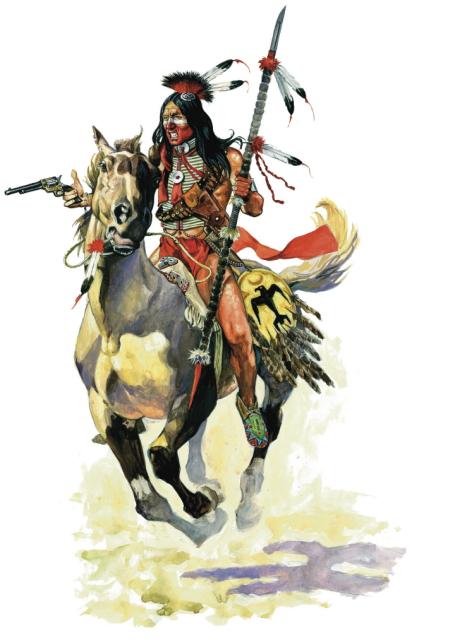
Wojownik z plemienia Hunkpapa Siuks uzbrojony w rewolwer Colt Peacemaker, oszczep, nóż i tarczę
Immediately after the two Custer battalion wings converged on Calhoun Hill, the left wing moved north along battle ridge to investigate any northern ford, and confirm the location of the non-combatants. Warriors attempting to interfere with Yates’ movement were suppressed, and Yates’ troopers eventually moved, with little resistance, north-west along the Cemetery Ridge. Custer and his staff probably accompanied Yates’ wing in this reconnaissance. They rode about a mile beyond Custer Hill, within sight of the north ford and Squaw Creek. Across the river, thousands of Indian non-combatants were seeking refuge. Custer would need the additional 300 men from Benteen and the pack train before he could do more. The left wing then retraced its steps, moving along the flats, back toward Cemetery Ridge.
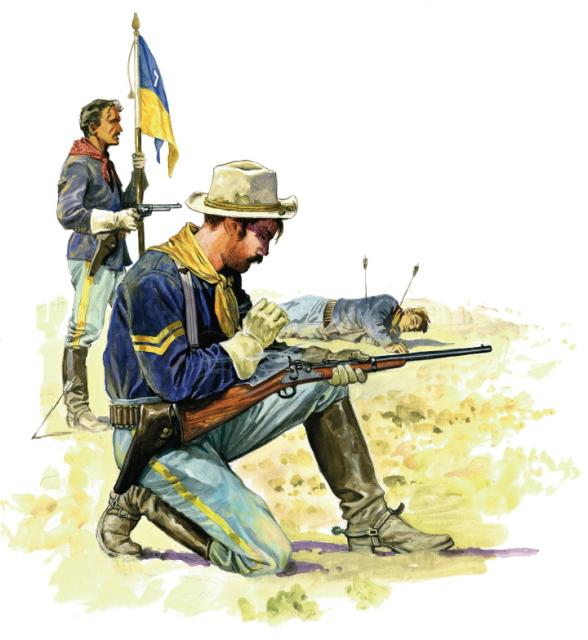
Kapral 7. Pułku Kawalerii Stanów Zjednoczonych w mundurze polowym, uzbrojony w odtylcowy karabin kapiszonowy Springfield wz. 1873 w wersji kawaleryjskiej (Trapdoor Carbine) i rewolwer Colt wz. 1873.
While Custer and the left wing were beyond Cemetery Ridge, Crazy Horse and his mounted following crossed the Little Big Horn River at the mouth of the Deep Ravine, just north of the village. They ascended through the Deep Ravine and crossed the mile-long Battle Ridge far to the north of the right wing, then took a covered position in the ravines along the east side of the ridge and began to infiltrate towards the right wing. With Gall approaching Calhoun Hill from the south, the Cheyenne leader, Lame White Man, to the west, and Crazy Horse now to the east, the encirclement was complete.
It was about this time, 4.50pm, that Capt. Weir departed Reno Hill with D Company. Custer’s left wing returned to Cemetery Ridge and deployed in skirmish formation, with E Company taking up a position near Custer Hill and F Company just below it. Indian aggressiveness intensified as their numbers rapidly increased. They began to close in from all directions. Cheyenne war chief Two Moons and Runs the Enemy attempted to stampede the grey horses (E Company) near Cemetery Ridge, but were deterred by carbine fire. The Custer battalion waited, looking south-east for Benteen. Calhoun and Keogh were on Calhoun Hill, Custer, Yates and Smith on Cemetery Ridge. The skirmishing continued for 20 or more minutes, as the hostiles continued to infiltrate.
Captain Keogh, Custer’s right wing commander, had deployed three companies (L, C and I) on Calhoun Hill in the standard US Cavalry textbook formation. As warriors continued to arrive from the Reno fight, L company became more heavily engaged from the west and south. The horses were in jeopardy, and their holders were taking fire from Calhoun Coulee. Keogh dispatched C Company, led by Lt. Harrington, to charge west into Calhoun Coulee and dislodge a small group of warriors who were threatening the horses and men. The charge failed because the troops were exposed to intense fire when they came into range of Greasy Grass Ridge and other positions. The survivors fled back to Calhoun Hill and were immediately pursued by mounted warriors led by the Cheyenne chief Lame White Man.
Warriors to the south, following Gall, seized the opportunity. They rushed up the southern approaches to Calhoun Hill in an intense blaze of rifle fire. This sudden shock triggered a collapse of the position, since a few troopers panicked and attempted to flee, encouraging many more warriors to surge forward. They charged in, mounted and on foot, from several directions, engaging in ferocious hand-to-hand combat. Some soldiers were cut down fleeing, others grouped together and made easy targets for the warriors with bows. Lt. Calhoun was killed in one of these small groups. Some of the soldiers on horseback fled the 600 yards towards Keogh’s position, but most of those on foot were ridden down.
As Calhoun’s company collapsed, engulfed by Sioux and Cheyenne Warriors, Keogh’s I Company deployed to engage the pursuing warriors. They were unable to react fast enough, and were shaken by the sudden turn of events. When the survivors fled towards I Company, tactical cohesion disintegrated there also. Crazy Horse and his following were encroaching from the ravine north-east of Keogh, in perfect position to attack. They swept in on all three companies from the east, as the other warriors pursued C and L Companies from the south and west. The entire element was surrounded and cut to pieces.
The left wing was also under some pressure as the hostiles closed in. Pinned, and out of supporting fire range, Custer must have watched in horror as events rapidly unfolded before him, less than a mile down the ridge. There was little opportunity to react, for within a matter of minutes the right wing had disintegrated.
Absolute chaos reigned as more frenzied warriors surged forward and terrified troopers tried to flee. More soldiers bunched together and resisted before being killed or forced to run away. Captain Keogh was killed with a small group of his men on the eastern slope of the ridge. The fight moved along the ridge from Calhoun Hill to Custer Hill. Over half the battalion was gone; the remainder were surrounded and outnumbered.
The left wing was able to maintain tactical cohesion as they deployed to receive about 20 left wing fugitives. A skirmish line from E Company opened fire on the pursuing Indians, checking the warriors’ advance along the ridge. With barely more than 100 soldiers left, E and F companies were surrounded near Cemetery Ridge and Custer Hill. They were now outnumbered by as many as 15 or 20 to one and there was no sign of Reno or Benteen.
Both companies made their way towards the top of the hill. It was a poor position, with thousands of warriors moving in for the final attack. Exposed troopers were picked off, while groups of mounted warriors stampeded many of the Army horses. The Sioux managed to concentrate on the weakest points. They continued to attack by fire, to pin and suppress. Other warriors remained mounted and mobile.
The surviving members of Custer’s command hunkered down behind dead horses as Indians further encroached on their position. Ammunition shortages could not have been a critical concern, for most Indian accounts testify that captured cartridge belts had ample rounds still on them. Custer may have been shot at this point, for a mounted foray was attempted without him. With the greater threat coming from the direction of Calhoun Hill to the south, E company mounted what horses were still available, and made a dash toward the west. The E Company commander was left behind, dead or wounded on the hill. Whether to escape or to drive off enfilading snipers, the manoeuvre failed. Thousands of warriors diverted their movements into the Deep ravine.
About 50 men (F Company and right wing survivors) remained on Custer Hill. The numbers dwindled as Indian firepower took its toll. Finally a group of 15-20 dismounted soldiers desperately attempted to flee toward E Company in the Deep Ravine. They were shot or ridden down, and their bodies lay scattered from the hill to the upper portions of the ravine.
The final event was an anti-climax to the battle. Those soldiers on Custer Hill who were wounded or did not attempt to flee were overrun by the victorious Sioux and Cheyenne. It is doubtful that any of Custer’s group were left standing as warriors closed in to finish them off. There was some resistance, as a few warriors were killed in the final hand-to-hand melee.
Custer was either dead or dying by this time. He was found on top of a soldier, and horse, shot in the chest, and then in the left temple. On the ground next to him were 17 shells from his Remmington sporting rifle. Nearby lay his brother Tom, shot full of arrows and his adjutant Lt. Cooke. Capt. Yates and 2nd Lt. Reily, the Company F executive officer, were on the hill with about 20 other F company troopers. Lt. Algernon Smith, E Company commander, was the only man from his company found on Custer Hill. There were 42 bodies on the hill and 39 dead horses. The 210 men of the Custer battalion were all killed. By 6pm the mounted warriors were beginning to attack Weir and Benteen. Custer’s troopers were stripped and mutilated by the warriors and women who stayed behind.
Śmierć Custera nad Little Big Horn, mal. Hans von Schmidt, 1950 r.
Mjr Marcus Reno
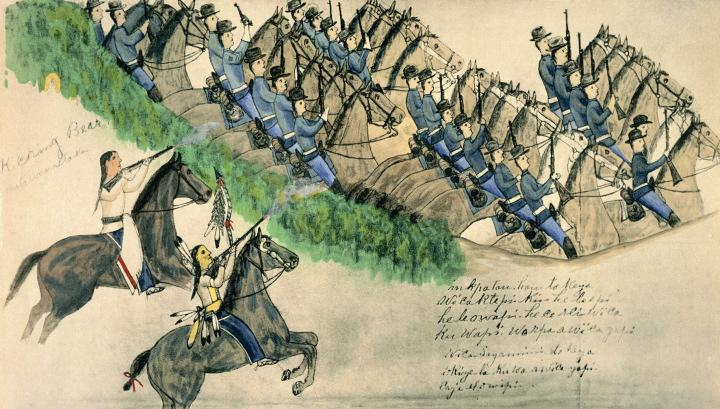
Początek bitwy nad Little Big Horn, rys. Amos Bad Heart Buffalo
Odwrót oddziału mjr. Reno, rys. Amos Bad Heart Buffalo
An extract from Men-at-Arms 344: Tribes of the Sioux Nation
The context of Custer’s Last Stand - The 1876 campaign
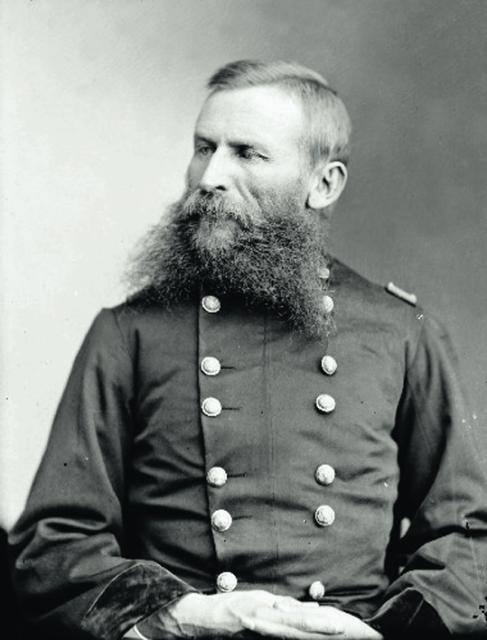
Gen. George Crook
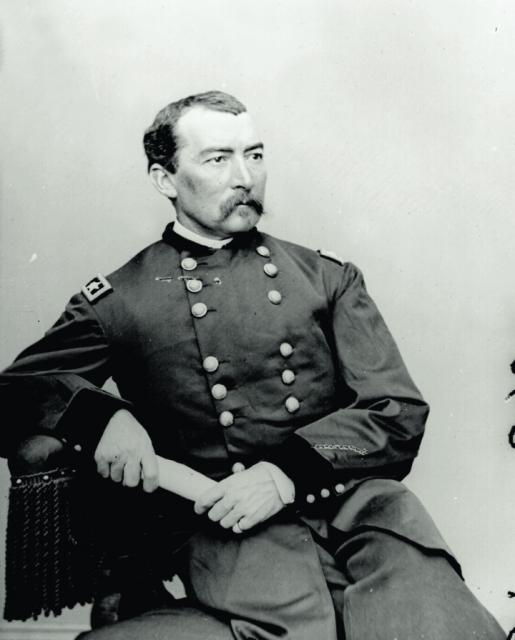
Generał Philip H. Sheridan
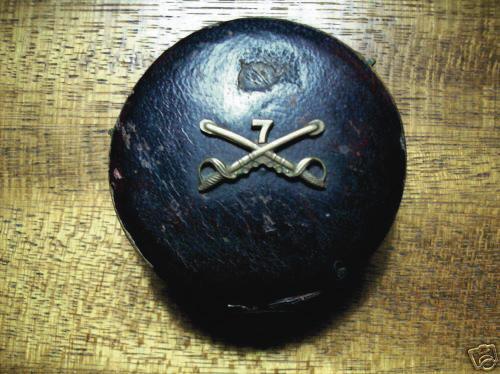
Kompas z emblematem 7. Pulku Kawalerii
Kpt. Thomas McDougall
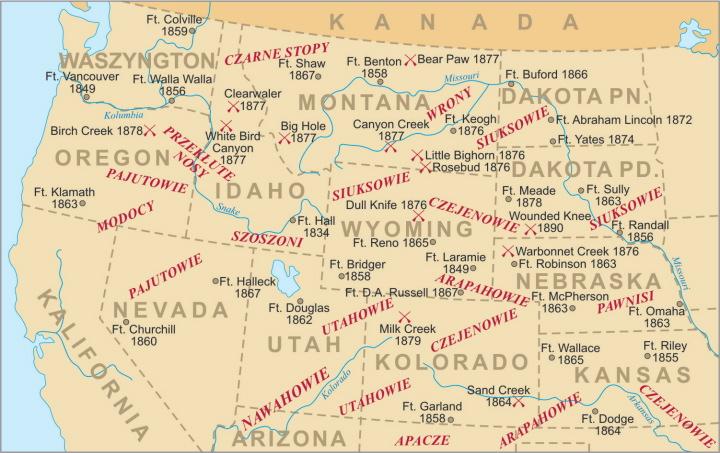
The US Army strategy for 1876 was to force these Sioux and their Cheyenne allies back to the agencies by encircling the Indians in south central Montana with three columns of troops: one under Col John Gibbon moving east from Fort Ellis at Bozeman, the second under Gen Alfred Terry (with Custer) moving west from Fort Abraham Lincoln near Bismarck, and the other under Gen George Crook moving north from Fort Fetterman on the North Platte. However, each column had only about 1,000 troops, some of dubious quality, who faced long marches to reach the area of the Rosebud, Tongue and Big Horn Rivers where the Indians were ranged. The plan received a major setback on 17 June on the Rosebud when Crook’s 1,300-strong column was defeated by Crazy Horse, forcing him to withdraw to his base near present-day Sheridan, Wyoming; Crook took no further part in the campaign.
Terry and Gibbon met on the Yellowstone at the mouth of the Powder on 8 June, and conferred again on 21 June on the steamer Far West near the mouth of the Rosebud. Custer was despatched thence on 22 June, south down the Rosebud, with orders to swing north-west to the forks of the Big Horn and Little Big Horn, where Terry and Gibbon would be waiting. Custer tracked the pony hoofprints of the Indians west to a point now known as the Crow’s Nest, a ridge about 15 miles from where a huge Indian village stretched along the Little Big Horn River. Custer’s Arikara and Crow scouts reported the village early on 25 June, but they underestimated the numbers of hostiles in the vicinity.
Custer attacked at once, dividing his 7th Cavalry into three parties. Captain Frederick Benteen, with Companies D, H and K, was sent south to scout and report Indian movements; Maj Marcus A.Reno led Cos. A, M and G against the southern edge of the village. Custer himself would advance northwards with Cos. C, E, F, L and I, some say following the line of a ridge running parallel to the village, which was scattered along the wooded valley to his left on the west bank of the Little Big Horn River. He then apparently swung west over the crest of the ridge, intending to cross the river and attack the northern end of the village. All we really know of the Custer attack is from Indian accounts recorded much later, and these are often confused. At what point he crossed the ridge or even if he ever reached the river remains in dispute. His column was certainly repulsed and cut to pieces, some succeeding in retreating to a rise since named Custer Hill, where a monument now stands. Custer was outnumbered and totally overwhelmed by fresh and probably better-armed warriors frantic to defend their women and children.
With him died 214 men, including his brothers Tom and Boston, a nephew and a brother-in-law. Mutilated corpses were found in four groups strewn on Calhoun Ridge, and another about half a mile north. Some 40 men had fallen with Custer on the hill which bears his name, and about 30 bodies were found near the river in a ravine. To the south, Maj Reno hit the village but halted his charge when confronted by an enormous number of warriors; he formed a skirmish line, from which he later retreated across the river, to be rejoined by Benteen’s battalion, ultimately on a site now known as Reno Hill. Here fighting continued until 26 June; no serious attempt was made to break out of this defensive position, although a few made brave dashes to reach water, and one of Benteen’s officers, Thomas B.Weir, moved to a vantage point from where his troops caught glimpses of the Indians through the smoke of battle to the north. After losing 47 killed, Reno was relieved by Terry on the 26th, shortly after the great Indian camp had broken up, setting fire to the grass – the Indians knew retribution was bound to follow.
During the high summer and autumn of 1876 Crook returned to the field, where his subordinates Col Wesley Merritt (5th Cavalry) and Capt Anson Mills (3rd Cavalry) gained victories over the Sioux at Warbonnet Creek, Nebraska, and Slim Buttes, South Dakota, respectively; in the latter fight Chief American Horse was killed. In October Col Nelson Miles held a meeting with Sitting Bull which ended in a running battle. During the following winter Cols Miles and Mackenzie (4th Cavalry) harassed the Cheyennes and Sioux, until by May 1877 most had returned and surrendered to the agencies.
However, the flow of fortune-hunters into the Black Hills did not diminish despite the fighting. Another government commission was charged with the task of obtaining the Black Hills by a treaty change to the western boundary of The Great Sioux Reservation. Although the agency chiefs Red Cloud, Red Leaf, Spotted Tail and John Grass signed, many did not; but the articles of the agreement were passed by Congress in February 1877. Sitting Bull crossed into Canada with High Bear and Gall, but Crazy Horse and his Oglalas and Cheyennes were defeated by Col Mackenzie; Crazy Horse surrendered in the spring of 1877, and was imprisoned and murdered. Gall and Sitting Bull returned to the Standing Rock Agency in 1881.
The decade of the 1880s was a traumatic time for the Western Sioux. The Great Sioux Reservation – all of present-day South Dakota west of the Missouri River – had been set aside for the seven western Sioux bands by the treaty of 1868. It was reduced in size by the Black Hills cession of 1877, and again in 1889 when the Sioux surrendered nine million acres and were forced to accept six separate reservations in place of the single large one. Using the control of rations the Indian agents sought to destroy the old Indian social and religious customs, including discouraging Indian dress and hairstyles. The nomadic warrior-hunter culture had gone, and the Sioux were to become farmers, ranchers and Christians; many were dependent upon agency rations for food, as the last of the buffalo had gone by 1884. The Sioux were no longer in control of their own destiny.
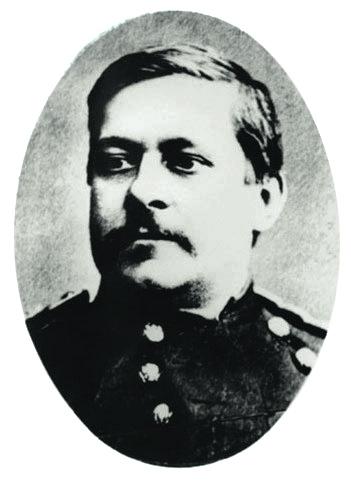
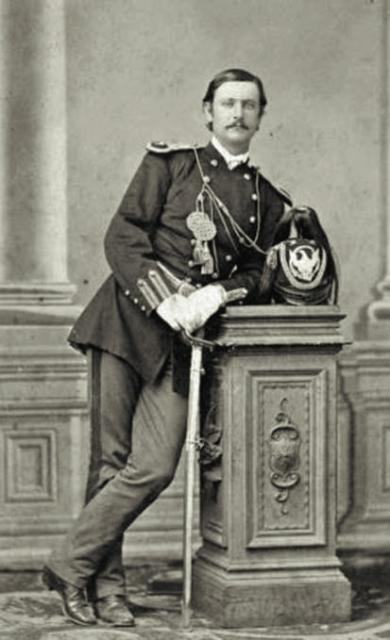
In 1889 the Sioux heard of a new cult which derived from earlier forms amongst the Paiute Indians of Nevada. Sioux pilgrims visited the cult leader Wovoka at Walker River, and on their return described him as Messiah, having returned from heaven with a message of peace and reconciliation. The Sioux, however, added their own interpretations: a new earth, the return of the buffalo, and the belief that wearing ritual clothes painted with symbols would protect the wearer if shot by white soldiers. The Ghost Dance rituals – so-called because it was claimed that the ghosts of ancestors would return – aroused great excitement on the Sioux agencies in 1890, both amongst the Indian converts and the military. The agent at Standing Rock, James McLaughlin, ordered the Indian police to restrict Sitting Bull, whose ardent followers had been Ghost Dancing for weeks. In the confrontation which followed outside Sitting Bull’s cabin on 15 December 1890 the chief was shot dead by Red Tomahawk, an Indian policeman.
A band of Ghost Dancers from Cheyenne River under Big Foot, heading south for the Bad Lands presumably to join Kicking Bear and Short Bull, was intercepted by Maj Whitside and escorted to Wounded Knee Creek on the Pine Ridge Reservation. By a twist of fate the troops who now held Big Foot’s band were from the 7th Cavalry, cut to pieces on the Little Big Horn 14 years earlier. On 29 December 1890 the soldiers, now under the command of Col Forsyth, surrounded the Indian camp; and during the confrontation that followed soldiers using rifles and howitzers killed 300 men, women and children. The dead were buried in a common grave, which remains today a memorial to the long sufferings of the Sioux people over the past three and a half centuries.
An extract from Men-at-Arms 163: The American Plains Indians
The war costumes of the American Plains Indians
The war costumes of the American Plains Indians
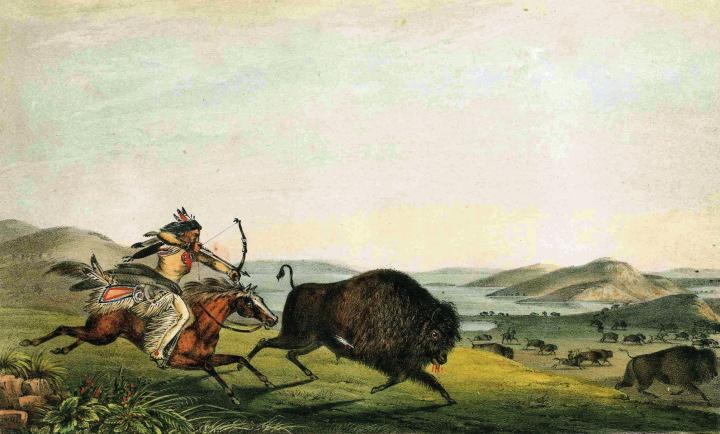
Polowanie na bizona, litografia z XIX w.
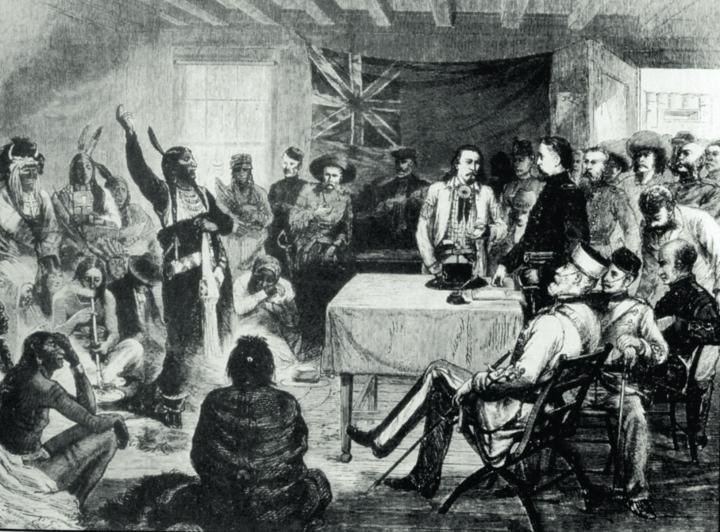
Wodzowie Siuksów na spotkaniu z komisją gen. Terry’ego w forcie Walsh, październik 1877 r.
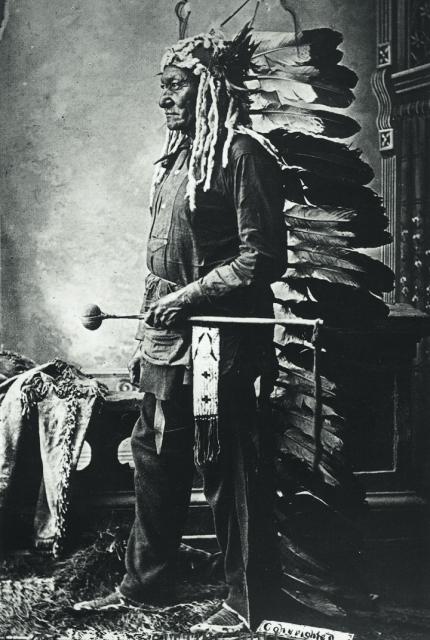
Siedzący Byk, wódz plemienia Hunkpapa z grupy Siuksów, w pióropuszu, fot. z 1885 r.
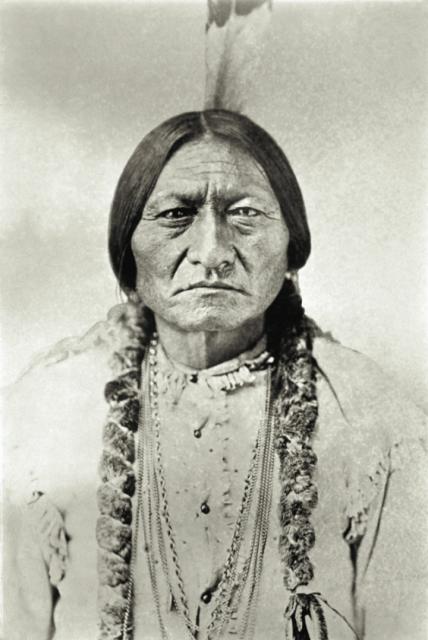
Siedzący Byk, fot. ok. 1885 r.
While a certain basic wardrobe was reserved simply for everyday comfort, the Plains warrior also wore highly decorative dress or war costume for ceremonies, parades, burial and battle, with embellishments which served various purposes. Firstly, display costume could denote society or tribal rank, or membership of a visionary cult. Secondly, designs reflected visionary experience and consequently invoked ‘medicine’, providing supernatural guidance and protection. Thirdly, war costume displayed achievement marks, retaining and proclaiming evidence of a warrior’s accomplishments.
The war shirt or ‘scalp’ shirt provides a good example of all three functions. In early years it was almost exclusively worn as a badge of office; this is most clearly illustrated by the leaders of the Sioux, who were called Shirt-Wearers, each being presented with a pained shirt fringed with hair symbolising the people they were responsible for. Prominent warriors, when they wore scalp-shirts as marks of distinction, fringed the neck and sleeves either with hair taken from an enemy or – particularly among the Blackfoot and Crow – with ermine pendants. Bands of beadwork or quillwork along the arms and over the shoulders, or in the form of rosettes, also denoted military excellence; among the Crow, for example, four such bands symbolised a holder of the four main coups.
War shirts were also decorated with painted representations of exploits, the symbols for different coups varying from tribe to tribe. Some commonly used designs were a hand, representing success in hand-to-hand combat; stripes, which could symbolise wounds or coups; pipes, numbering the war-parties led; and hoofmarks, indicating numbers of horses captured.
While a war shirt could therefore provide a pictographic record of the wearer’s coups, it also offered him supernatural protection through other designs and trimmings. Such shirts, which might form a vital part of a man’s war medicine, sometimes offered protection by association with the danger: for example, by depicting black dots or ‘tadpoles’ which supposedly made the wearer immune to bullets. Alternatively, shirts were painted with designs seen by the wearer in a vision, such as the bear or the eagle, which could impart protection from the Sacred Powers.
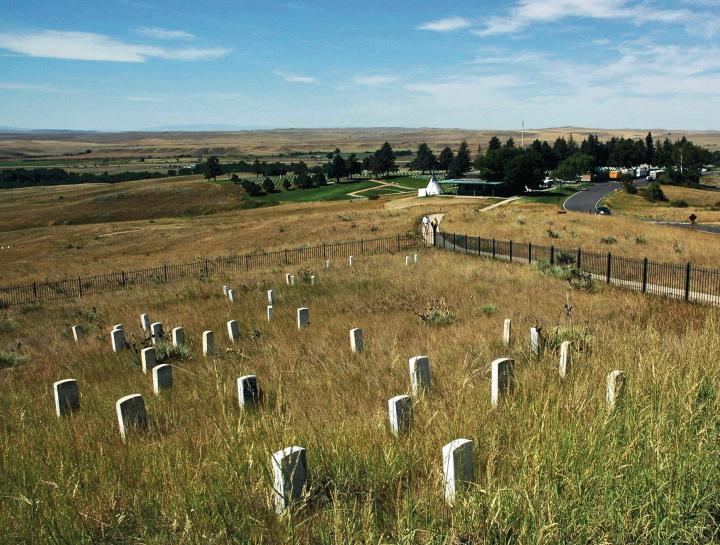
Kamienie upamiętniające Custera i jego podkomendnych poległych na wzgórzu nad Little Big Horn
No comments:
Post a Comment