https://ospreypublishing.com/thisweekhistory/
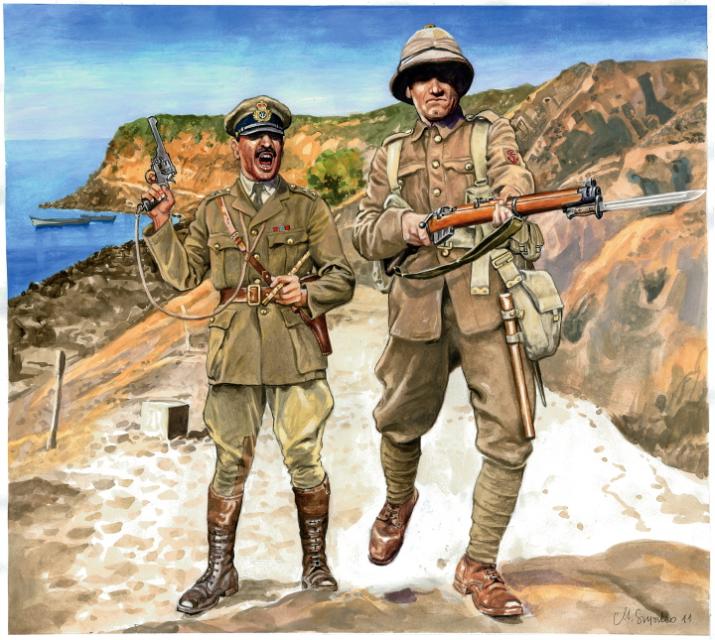 Oficer Dywizji Morskiej uzbrojony w rewolwer Webley Mk.VI oraz żołnierz z karabinem Lee-Enfield Mk.III
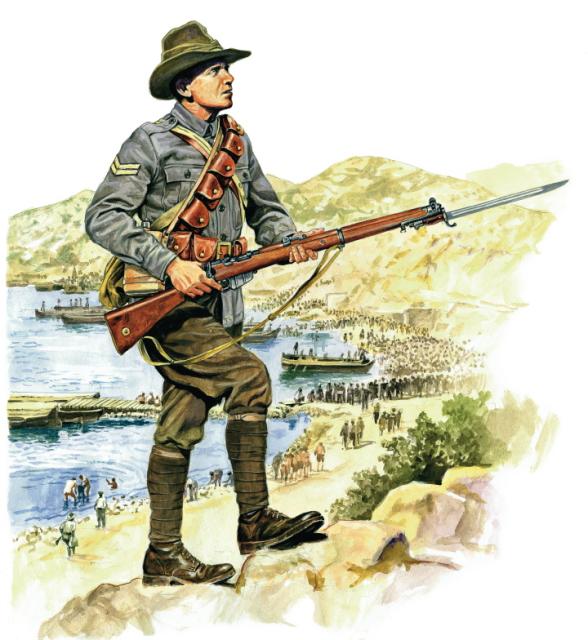 Piechur australijski z karabinem Lee Enfield SMLE Mk III
In the autumn of 1914, the Allies realised that Turkey, crucial because of its control over routes of contact between Russia and the Allies in the west, was not going to remain neutral as had been hoped, and action would have to be taken.
Two days before the outbreak of war, Germany and Turkey had agreed on an alliance against Russia, although this did not commit Turkey to military action. Events in the next few months, however, including the British requisitioning of two battleships built for the Turkish Navy in Britain, meant that the entry of Turkey into the war seemed increasingly likely. By September 1914, German command had been extended to the Turkish Navy, and the Bosphorus waterway had been closed in contravention of international law. Turkey was now firmly in the German camp. Following an ultimatum to the Turkish government, hostilities officially began on 31 October 1914. By early 1915, it was obvious that the war would be protracted, and that Russia was stretched fighting on two fronts. Into this context was born the plan to attack the Dardanelles.
Simply, the original plan was the forcing of the Dardanelles by a squadron of battleships, which were considered expendable. This would open the waterway for Russian ships and hopefully cause the downfall of the Turkish government. This would be followed by landings on the peninsulas. Plans developed, and a large number of powerful ships, with a force of British, French, Australian and New Zealander divisions (ANZAC forces), were allocated for the campaign.
The naval attack started on 18 March, firstly neutralizing the forts guarding the entrance of the waterway. Although this was mainly successful, the existence of mines in the waterway provoked heavy losses on the British and French ships. It now seemed that a naval attack was unlikely to succeed, and on 22 March, the plan was changed from a naval to a military operation. With hindsight, it can be seen that this diminished the chances of success, particularly as it is very possible that a renewed naval assault could have achieved victory.
From the beginning, the landings were confused, due in large part to poor intelligence and planning. Also, the necessary reorganisation of the land forces led to a month-long gap between the naval attack and landings, which not only destroyed any advantage of surprise, but gave German commanders time to strengthen and rearrange the defenders of the Gallipoli peninsula.
At dawn on 25 April 1915, the ANZACs landed (see extracts below). Five of the six beaches were secured with huge losses, and the campaign was underway. Through the heat of summer, a series of futile attacks failed to take any sites. Disease was rife, and it became clear that the Turkish soldiers were not the easy opponent they had been thought to be. Still, the ANZACs fought gallantly, famously earning the title ‘diggers’ after their digging of trenches on the beaches whilst under fire. The last great British attack, on 21 August, failed amidst scenes of horror as the undergrowth ignited, cremating hundreds of wounded men. With no further offensive possible, and no reinforcements available, recommendation was made for evacuation, which occurred on 19 December 1915 and 8 January 1916. Of some 480,000 troops sent ashore, 252,000 were killed, wounded, captured or evacuated sick.
This campaign, involving naval forces and naval aviation, as well as military forces, was heroic – but an unmitigated failure. Had it succeeded, its effect on the war would have been immense; however, the execution of the plan was unfortunately beset with ineptitude. Although the gallantry of the troops became legendary, the conduct of the expedition was unworthy of the courage of the troops that it sacrificed.
Further reading
Campaign 8: Gallipoli 1915 – Frontal Assault on Turkey details the entire doomed campaign from the original plans through to the final decision to evacuate; whilst Essential Histories 23: The First World War (4) The Mediterranean Front 1914–1923(extract below) puts the campaign into the context of the whole war.
For details of the troops that took part, Men-at-Arms 81: The British army 1914–18 includes details of the British Force sent to Gallipoli; Men-at-Arms 123: The Australian Army at War (extract below) includes details of the army that was established to support the British in World War I, and the force that was sent to the Dardanelles. Men-at-Arms 269: The Ottoman Army 1914-18 describes the enemy that the landing force were fighting, and clearly shows them to be a force to be reckoned with, as the landing force quickly discovered.
An Extract from Essential Histories 23: The First World War (4) The Mediterranean Front 1914-1923
The landings
The landings took place on the morning of 25 April. The Anzacs went ashore at first light, but were landed a mile north of the intended beach due to a strong off-shore current. Instead of a gently sloping hinterland and open country all the way to the Narrows (only five miles away across the peninsula) they were confronted with steep slopes – up which they rushed. Their impetus carried them to the heights of the Sari Bair ridge, brushing aside the resistance of Turkish detachments covering the beach; but as they arrived on the summits, blown and disorganised, they met a furious counter-attack led by Mustafa Kemal, which swept them back to the edge of the ridge. There they grimly held on, to positions that became their front line for the rest of the campaign. That night, a despondent Birdwood signalled Hamilton, afloat in the battleship Queen Elizabeth, that the situation was so confused that re-embarkation was the only solution. Hamilton ordered him to stick it out and ‘Dig, dig, dig’, unwittingly creating a legend.
At Helles on the tip of the peninsula the commander of the 29th division, Major General Hunter-Weston, had chosen to land in broad daylight, a decision for which his troops paid dearly. Coming ashore under tow in ship’s boats, rowed for the last hundred yards by bluejackets, they came under devastating fire at ‘V’ beach from the defenders. A naval aviator flying overhead was appalled to see that the water for 50 yards out from the beach was red with blood. At ‘V’ beach the landing was augmented by a ‘Trojan Horse’. The collier River Clyde had been modified, with extra ports in its sides, to beach itself and disgorge two battalions down ramps and across a bridge of boats to the shore. These troops also met withering fire as they emerged from the ship and were pinned down with the others on the shore. At ‘W’ beach on the other side of Cape Helles, only a mile away, the first battalion ashore, the Lancashire Fusiliers, fought their way off the beach through dense barbed wire, winning six Victoria Crosses in the process. Elsewhere around the Helles area the landings met little resistance, but Hunter-Weston ignored this, concentrating on reinforcing the slaughter at ‘W’ and ‘V’. By last light the 29th Division was shattered and incapable of exploiting inland. The day’s final objective, the dominating high ground of Achi Baba, five miles from the landing beaches, was never taken during the campaign.
The French landings at Kum Kale stirred up a hornet’s nest and fierce fighting took place before the troops were ferried across the straits to join their British comrades at Helles.
An extract from Men-at-Arms 123: The Australian Army at War
The Anzacs at Gallipoli
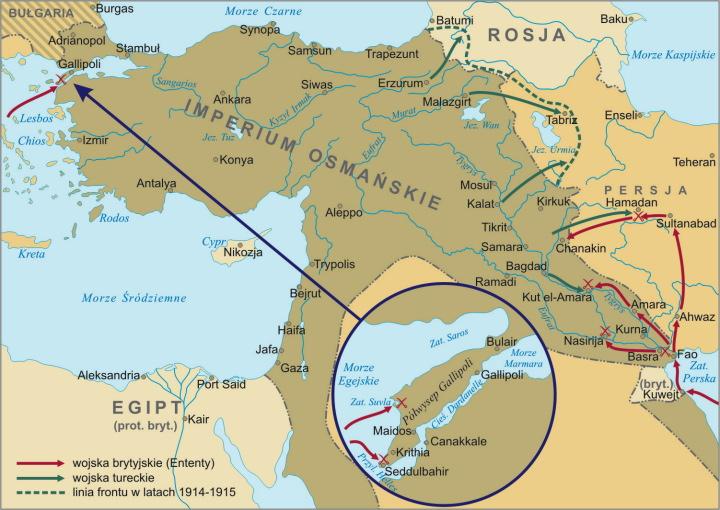
The Australian Imperial Force’s first major operation was the landing at Gallipoli on 25 April 1915. The object was to take control of the Dardanelles, the narrow strait linking the Aegean Sea with the Black Sea. Command of the expedition was given to Gen. Sir Ian Hamilton, who faced a daunting task. The Gallipoli peninsula has four sets of beaches – at Bulair at the neck, Suvla Bay, Ari Burnu and at the tip, Helles. Its mountainous spine is scarred with deep ravines and gullies.
The Australians and the New Zealanders were sent in to a dawn landing at Ari Burnu, but the first assault force, the Australian 3rd Brigade, was landed a mile too far north, at what was soon known as Anzac cove. A Turkish flare went up and soon a hail of bullets was spattering the shallows and striking sparks from stones on the beach. The boats grounded and the Australians jumped over the gunwales and splashed to the beach. Some were hit; others went in out of their depth and were dragged under by their heavy kit.
The troops faced almost perpendicular cliffs under which companies and platoons were jumbled in confusion. Junior officers quickly rallied the troops and within minutes a rough line of about six companies was clawing its way up the slopes. Some men moved far and fast. By 7am a young officer and two men had climbed three ridges and were looking down on the object of the whole operation, the Narrows, only three and a half miles away. Another party was halfway up Chunuk Bair, a dominating peak around which 50,000 men would be killed during the campaign.
As much furious fighting occurred on 25 April in the wild country around Anzac Cove as in any battle in history. No front line existed, and men landing later in the day were just as vulnerable to enemy bullets as men in the gullies inland.
Their first bayonet rush carried the Australians to a hill known as Baby 700, but incessant enemy fire made the position untenable. By nightfall the Anzacs held a position about two miles long by three-quarters of a mile deep. On Hamilton’s orders they burrowed, hacked and tunnelled into the seaward slopes of the ridges. For three days after the landing the fighting was savage, with wave after wave of Turks making frontal attacks on the Anzac lines.
By 1 May reinforcements were required. The only available forces were the Light Horse regiments in Egypt. Despite the value of the Light Horse in the defence of Egypt, the enthusiasm of the brigades to fight, even without their beloved horses, finally influenced Hamilton to employ the Light Horsemen in a dismounted role, but they served intact in their regimental and brigade groups.
The only grenades the Anzacs had were jam tins filled with explosive, nails, stones, pieces of glass and shell shards, so they became adept at catching the Turkish ‘cricket-ball’ grenades and throwing them back.
On the night of 18-19 May the Turks put 42,000 men into a massive attack on the Anzac position, where Gen. Birdwood had only 12,500 front line men. They killed thousands of Turks in the attack, and the first hour was sheer slaughter. At daybreak the Turkish officers gave up all efforts to lead, and drove their men into the Anzac fire. Australian reserves came pushing into the line, even offering to pay other men to make room for a place on the parapet. Later in the campaign Anzacs offered as much as £5 for the ‘privilege’ of getting an unofficial place in a bayonet charge. When the Turks broke off the action at midday they had lost 10,000 men; 5,000 of these, dead and wounded, lay in the open in No Man’s Land.
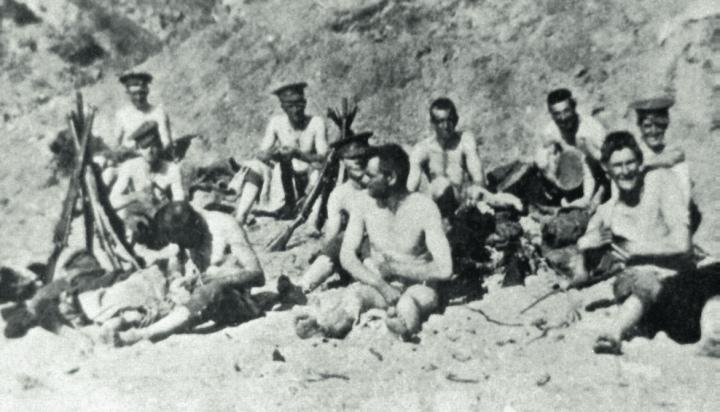
The Australians’ physical appearance impressed all visitors to Anzac. Compton Mackenzie, the novelist, then on HQ staff, wrote: ‘They were glorious young men. Their almost complete nudity, their tallness and majestic simplicity of line, their rose-brown flesh burnt by the sun and purged of all grossness by the ordeal through which they were passing, all these united to create something as near to absolute beauty as I shall hope ever to see in this world.’
But even ‘glorious young men’ are mortal. In fighting at Lone Pine, in August, six Australian battalions lost 80 officers and 2,197 men. Battalions of the 1st Brigade lost most heavily, and few witnesses of outstanding bravery remained. Consequently, of the seven Victoria Crosses awarded after this fight, four went to a reinforcing battalion, the 7th. In that fierce month two Light Horse units, the 8th and 10th, were practically wiped out.
Nowhere on the peninsula could the British and French make any significant progress; and eventually evacuation became inevitable. At Anzac Cove it was brilliantly planned by Lieut. Col. Brudenell White of the Anzac Staff. More than 83,000 men with horses, guns and some supplies were moved out in the period 10-19 December, with only two soldiers wounded in the final stages of the evacuation. The Australians left behind 7,594 killed; Gallipoli had cost them an additional 19,367 wounded.
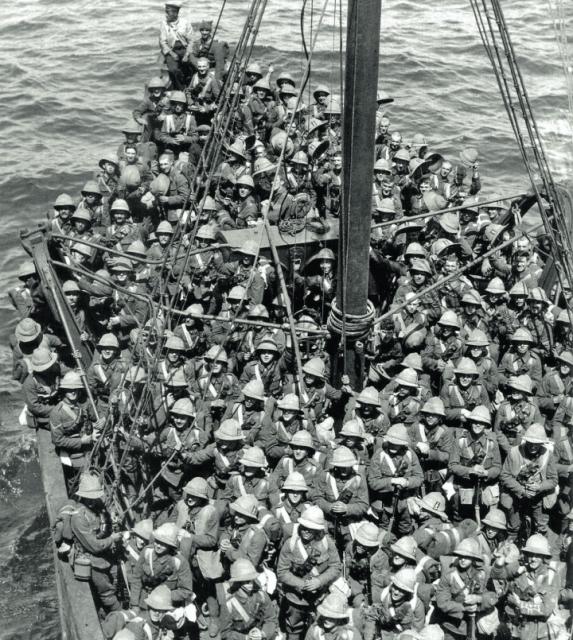 Żołnierze pułku Lancashire Fusiliers płyną na Gallipoli, maj 1915 r.
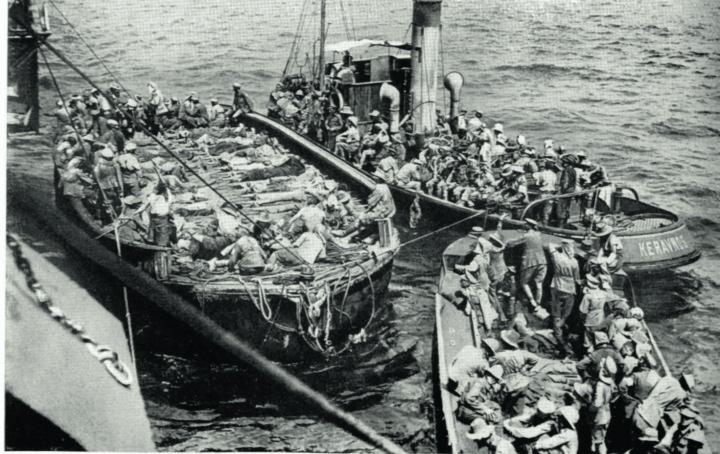
 Desant na Gallipoli – wojsko schodzi z pokładów okrętów do łodzi
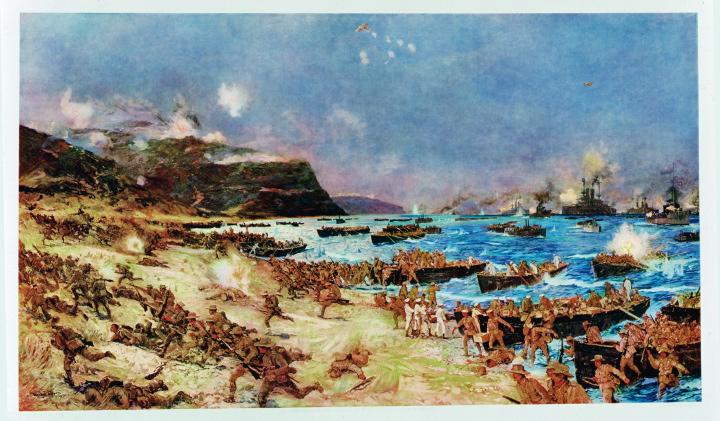
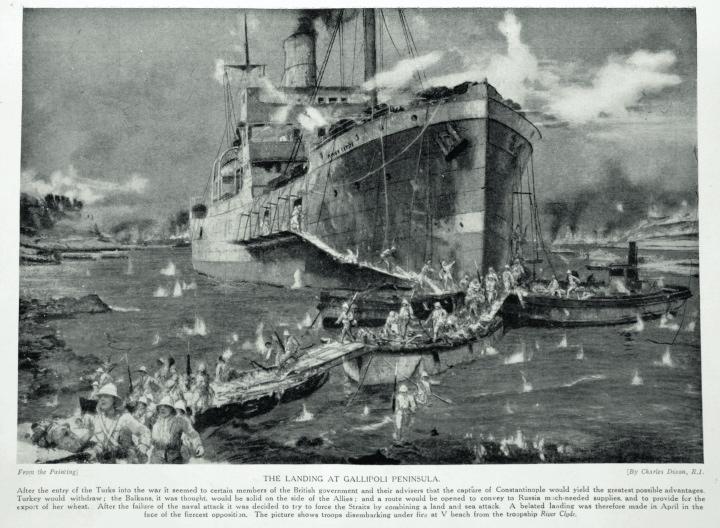 Lądowanie wojsk alianckich na Gallipoli 25 kwietnia 1915 r., rys. Charles Edward Dixon
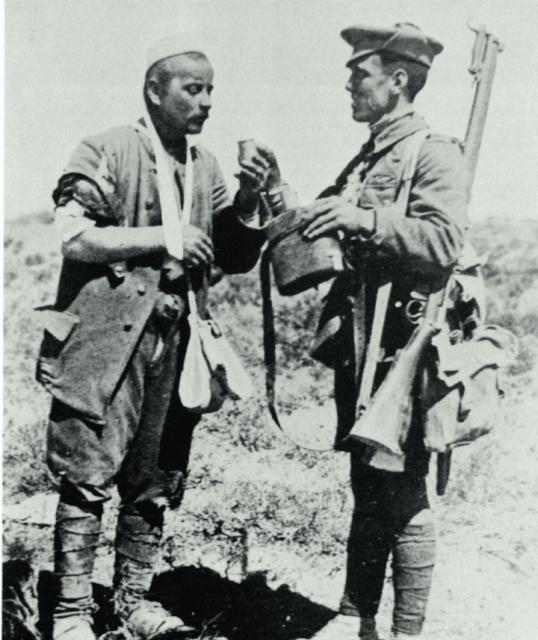 Brytyjczyk poi tureckiego jeńca
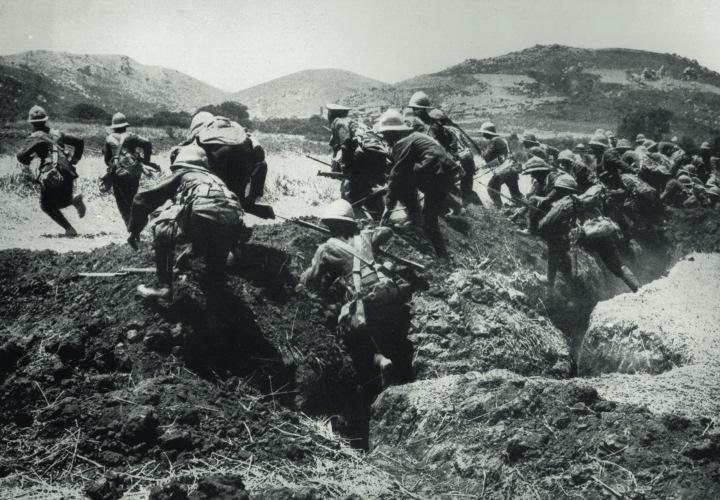 Atak brytyjskiej piechoty morskiej na Gallipoli, jesień 1915 r.
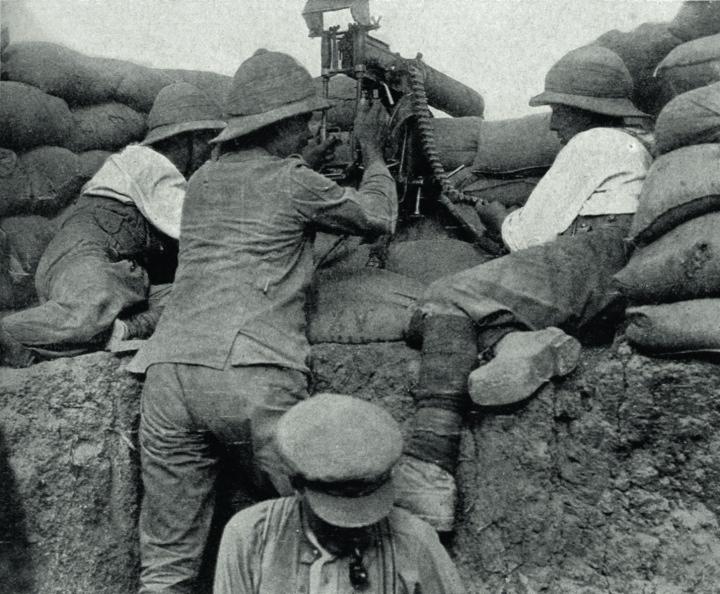 Brytyjski ckm na stanowisku ogniowym
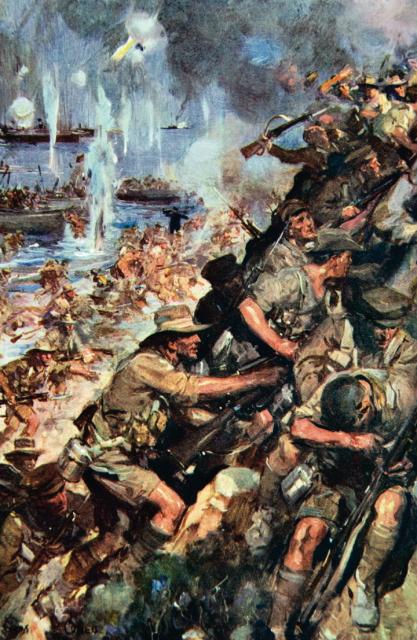 Żołnierze ANZAC szturmują wzgórza przy plaży, litografia z 1916 r.
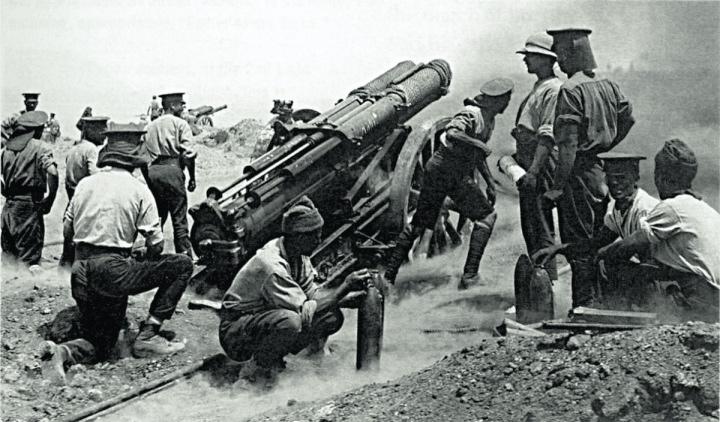 Brytyjskie działa 60-funtowe na przylądku Helles, czerwiec 1915 r.
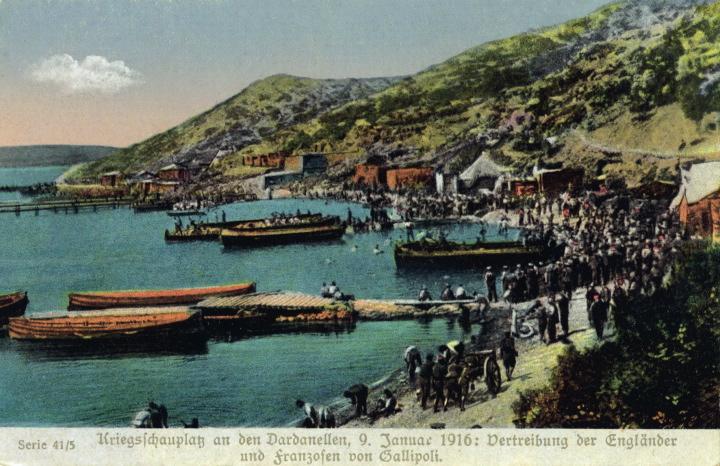 Ewakuacja sił alianckich z Gallipoli, 8 stycznia 1916 r., niemiecka pocztówka propagandowa
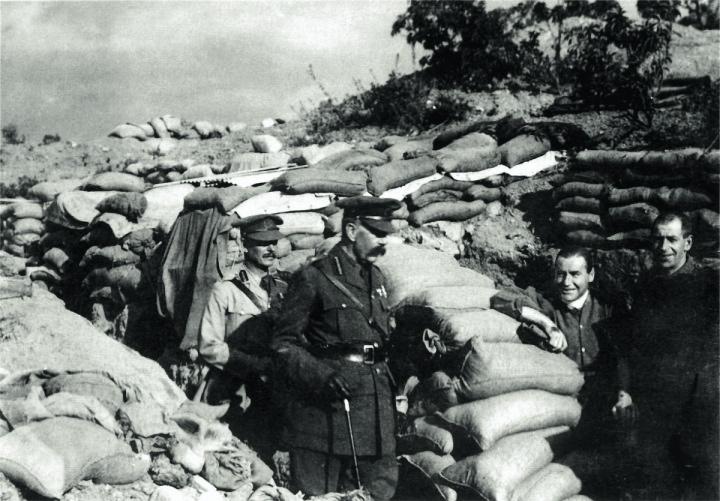 Lord Kitchener, brytyjski minister wojny, wizytuje przyczółek ANZAC
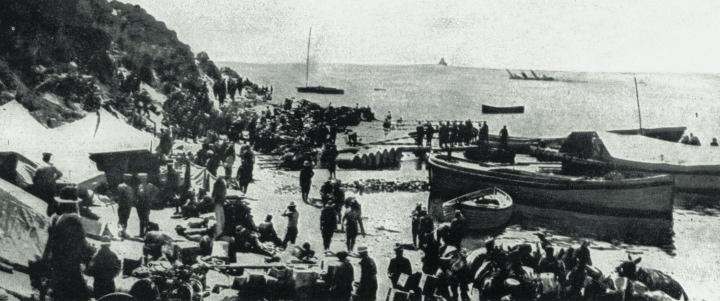
 Alianckie łodzie przy zdobytej plaży „V”, początek maja 1915 r.
 Siły ANZAC lądują 25 kwietnia 1915 r.
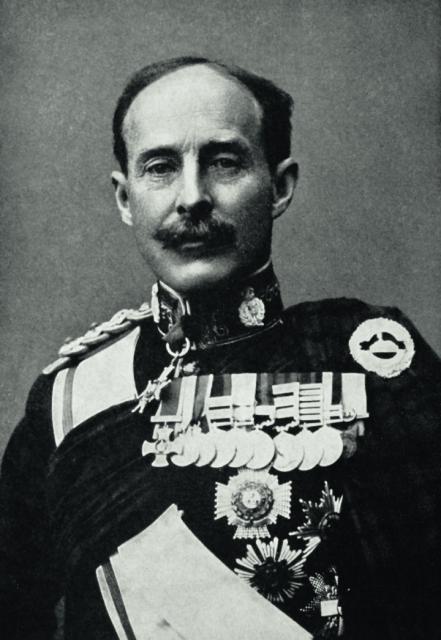 Gen. Ian Standish Monteith Hamilton, dowódca sił inwazyjnych na Gallipoli
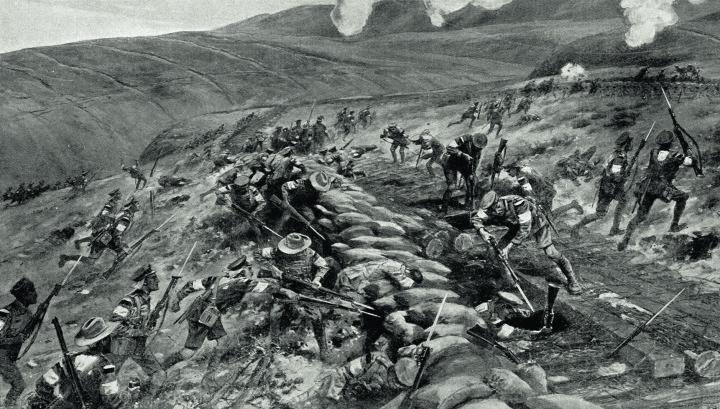 Australijczycy atakują pozycje tureckie na wzgórzach w pobliżu zatoki Anzac
 Lądowanie Australijczyków i Nowozelandczyków na Gallipoli, mal. Charles Edward Dixon
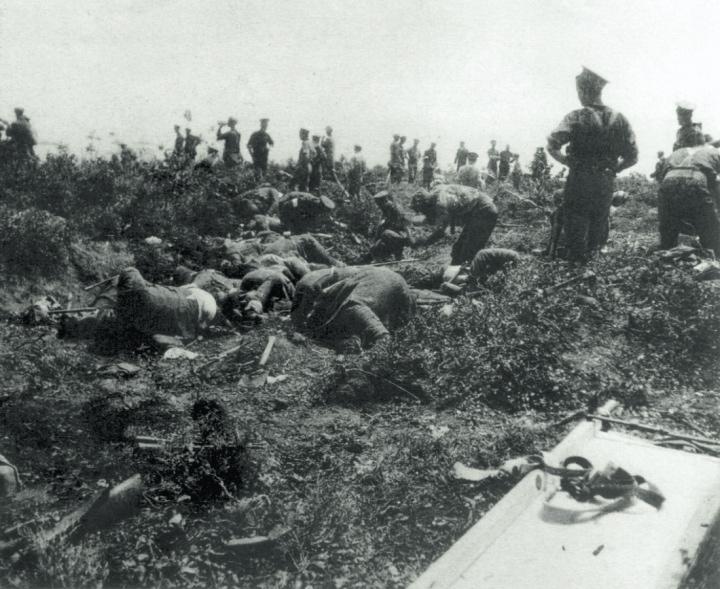 Zbieranie poległych podczas krótkiego rozejmu, 24 maja 1915 r.
 Brytyjscy żołnierze walczą z wszami
 Ewakuacja żołnierzy ANZAC z przyczółka północnego, grudzień 1915 r
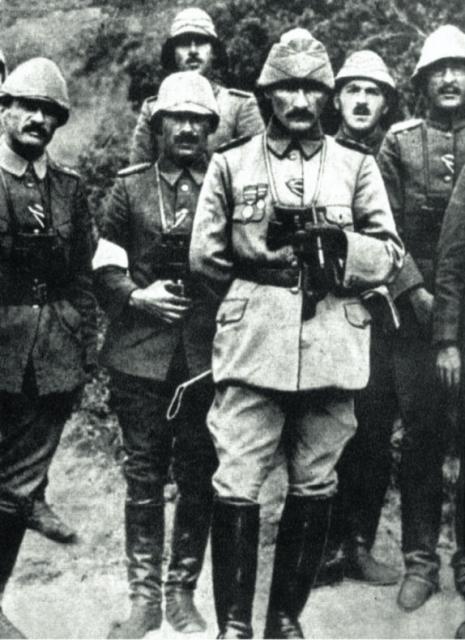 Gen. Mustafa Kemal, przyszły prezydent Turcji Atatürk, podczas walk na Gallipoli w 1915 r.
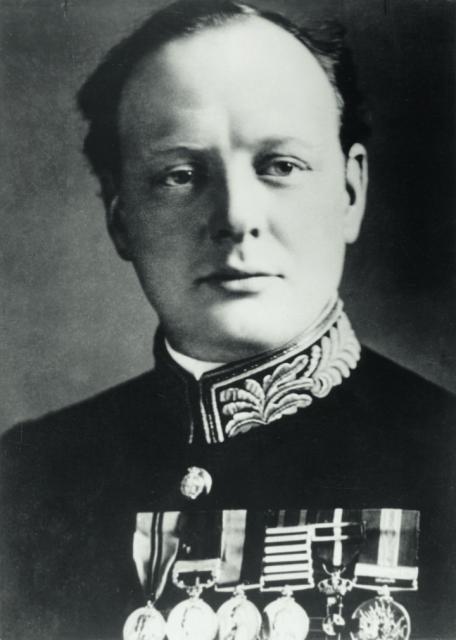 Winston Churchill, fotografia z 1912 r.
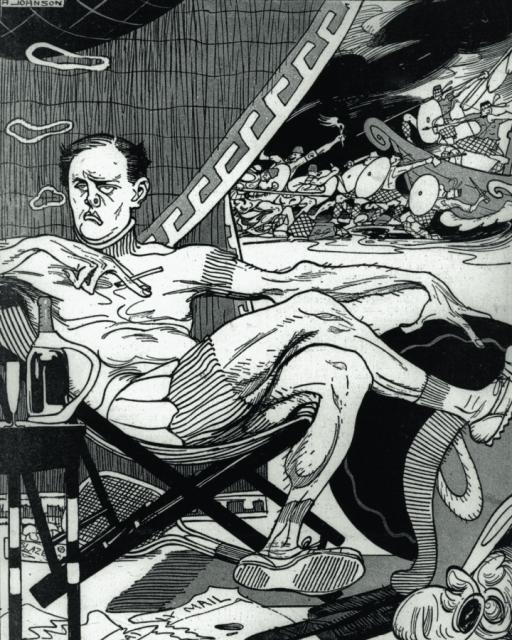 Churchill jako Achilles na wojnie trojańskiej, karykatura niemiecka z 1915 r.
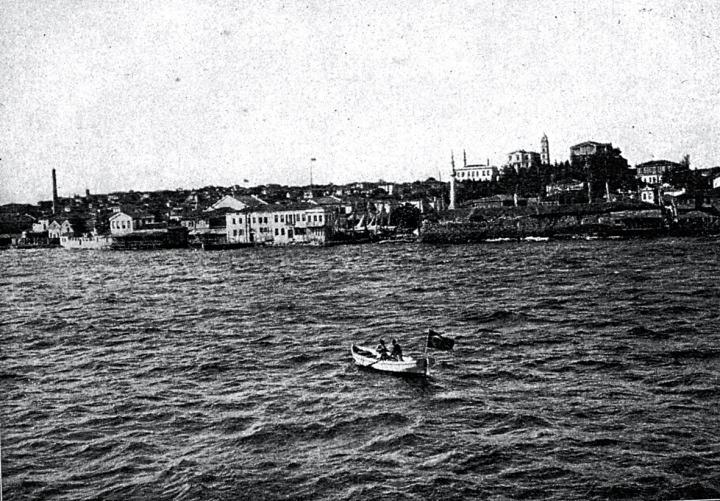
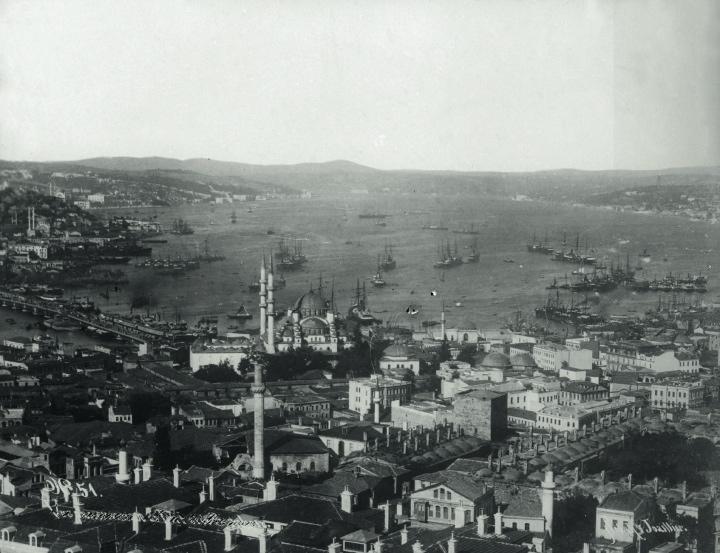 Istambuł – widok na miasto i port, ok. 1915 r.
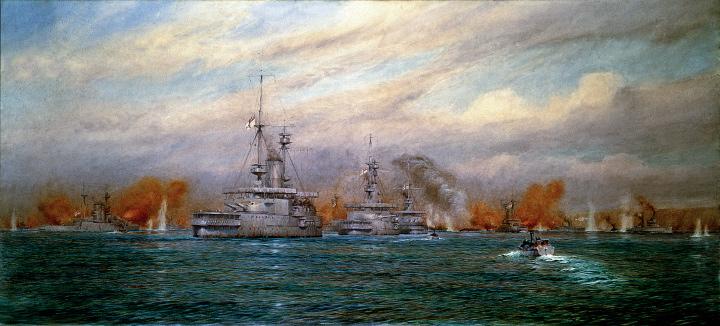
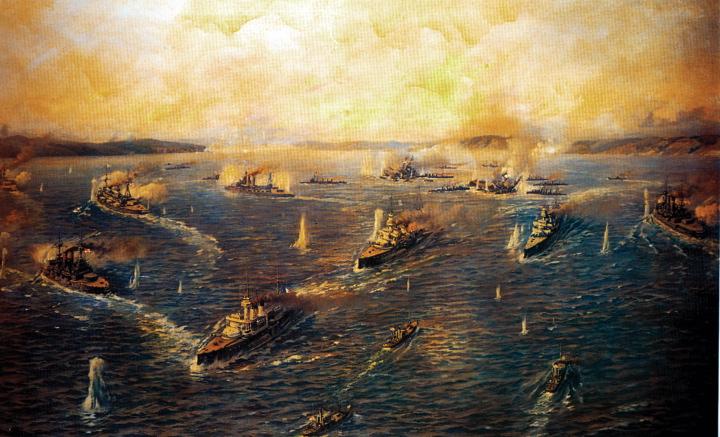
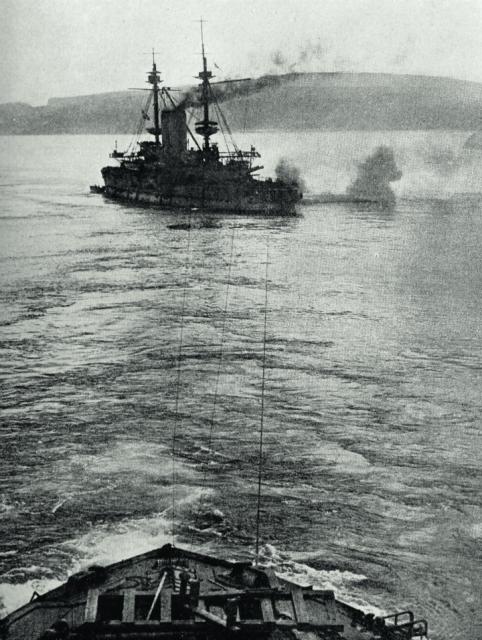 Alianckie okręty ostrzeliwują stanowiska Turków na Gallipoli, marzec 1915 r.
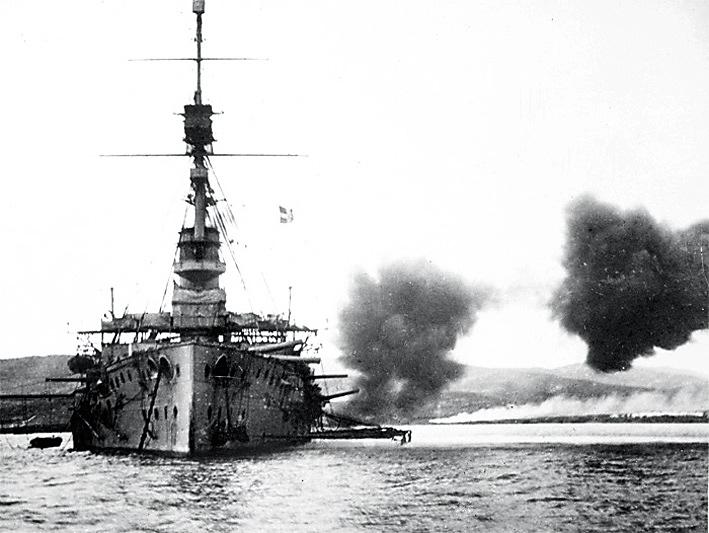
 Brytyjski pancernik HMS „Irresistible” tonie w Dardanelach po wejściu na minę 18 marca 1915 r.
 Enver Pasza, turecki minister wojny i naczelny wódz armii
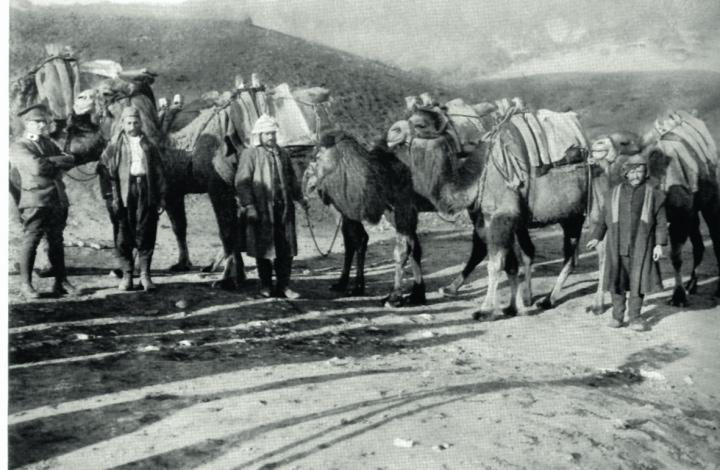 Wielbłądy dostarczające zaopatrzenie wojskom tureckim
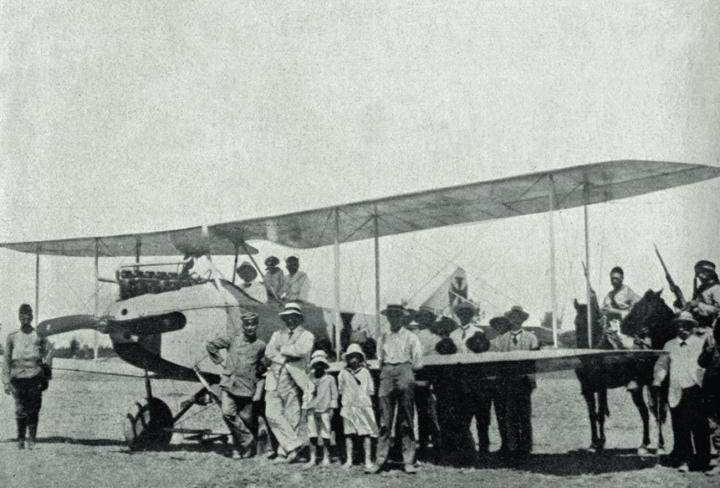 Samolot tureckiego lotnictwa
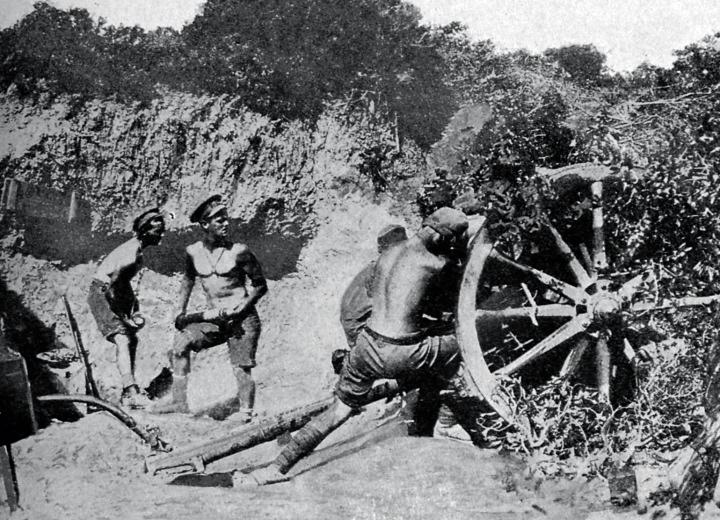
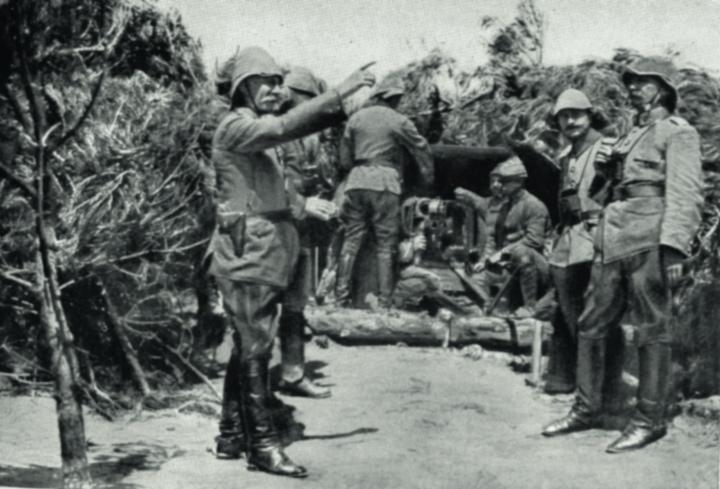 Stanowisko tureckiej artylerii na Gallipoli
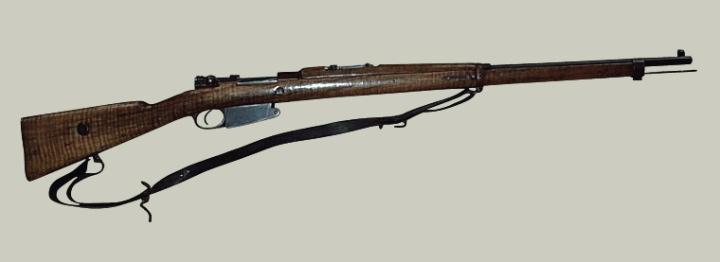
 Karabin Mauser armii tureckiej wz. 1890 r.
 Karabiny Mauser armii tureckiej wz. 1903/38, wersja rozwojowa karabinu wz. 1903
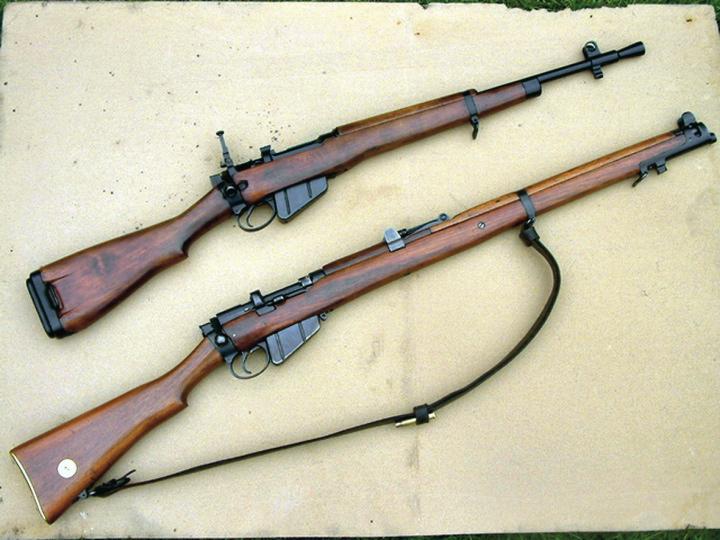 Dwie wersje karabinu Lee Enfield SMLE Mk III (b)
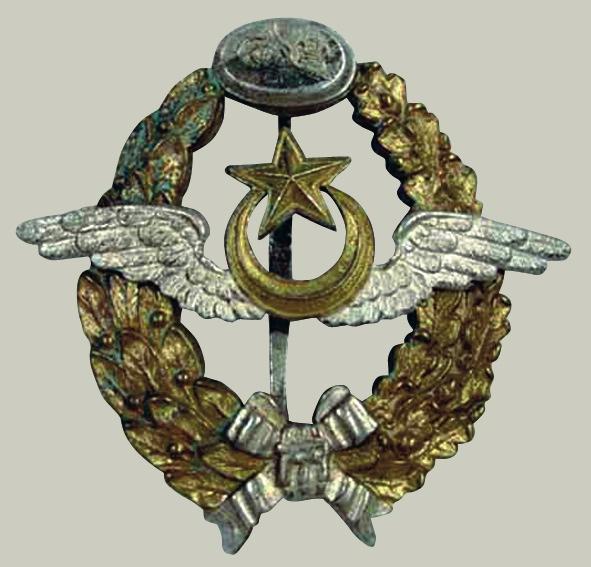 Odznaka tureckiego pilota z czasów pierwszej wojny światowej
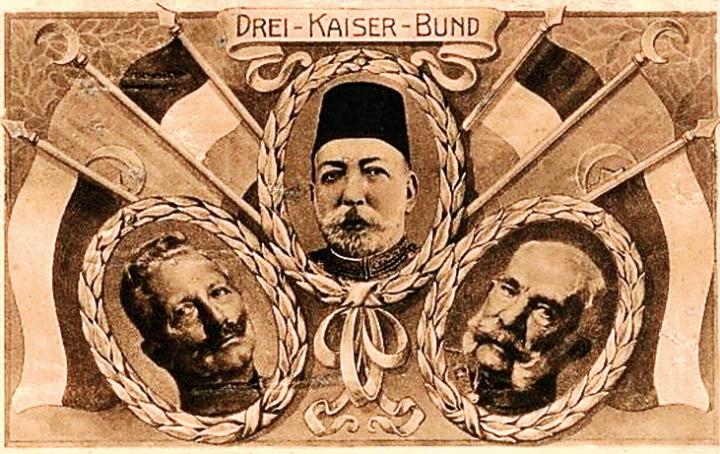 Sojusz trzech władców – cesarzy Niemiec i Austro-Wegier oraz sułtana tureckiego, niemiecka karta pocztowa z czasów pierwszej wojny światowej
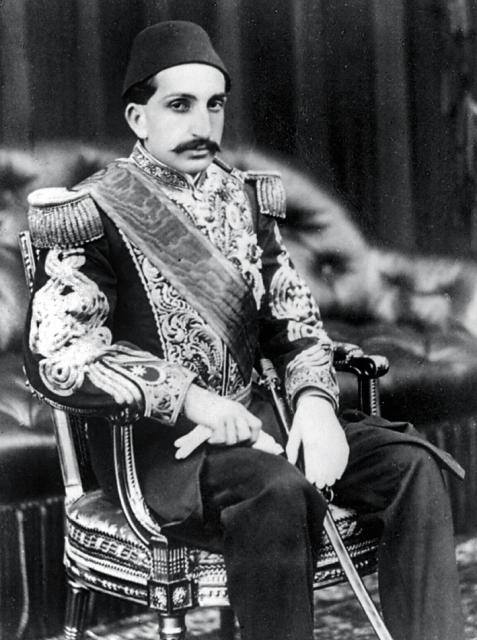 Sułtan turecki Abdulhamid II
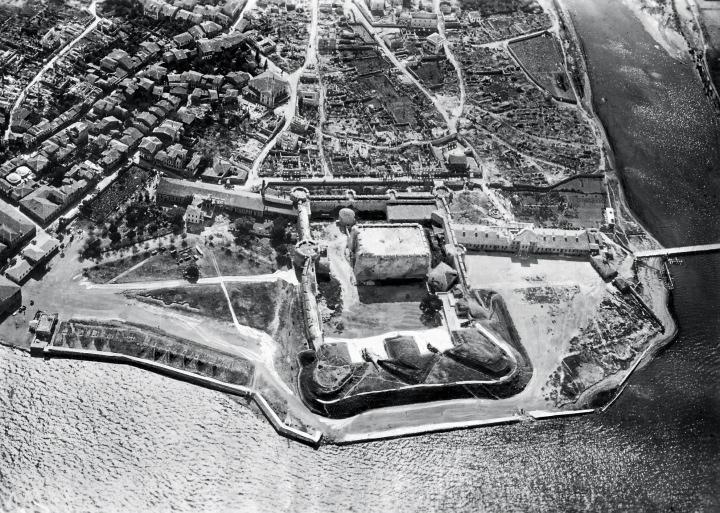 Turecki fort C , imenlik w Dardanelach
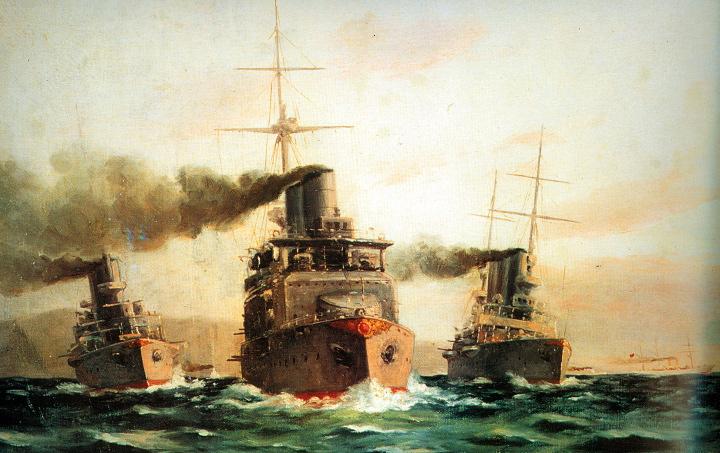 Okręty tureckie na morzu, litografia z epoki
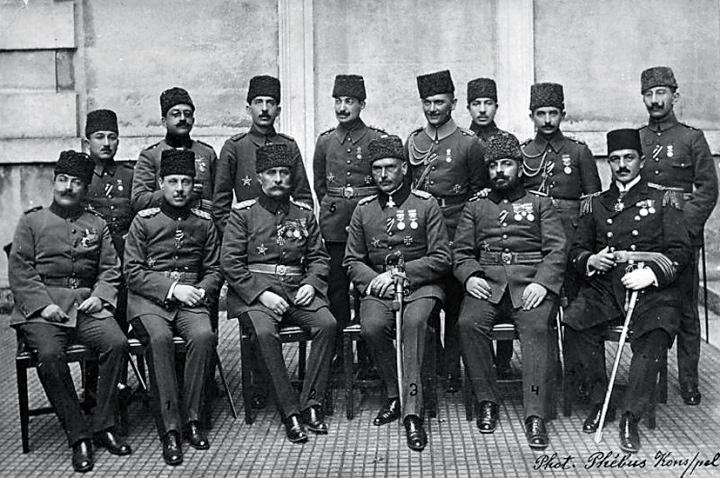 Gen. Otto Liman von Sanders (siedzi w środku) wśród tureckich oficerów
 Półwysep Gallipoli od strony cieśniny Dardanele
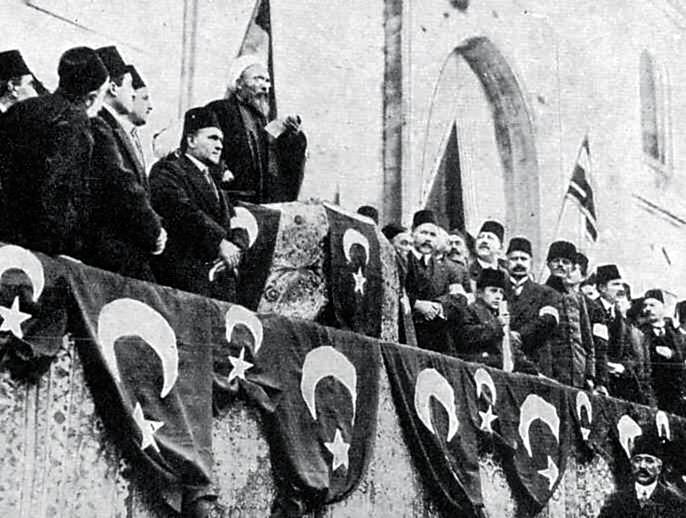 Ogłoszenie świętej wojny przed Wielkim Meczetem w Stambule, 12 listopada 1914 r.
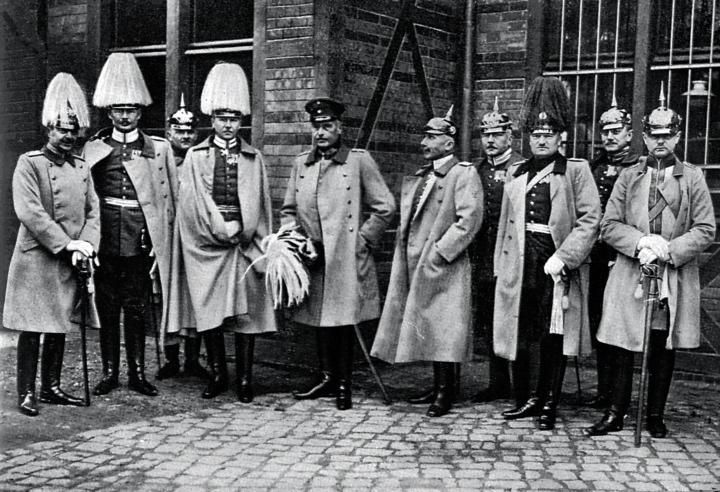 Niemieccy instruktorzy pomagający Turkom unowocześnić armię
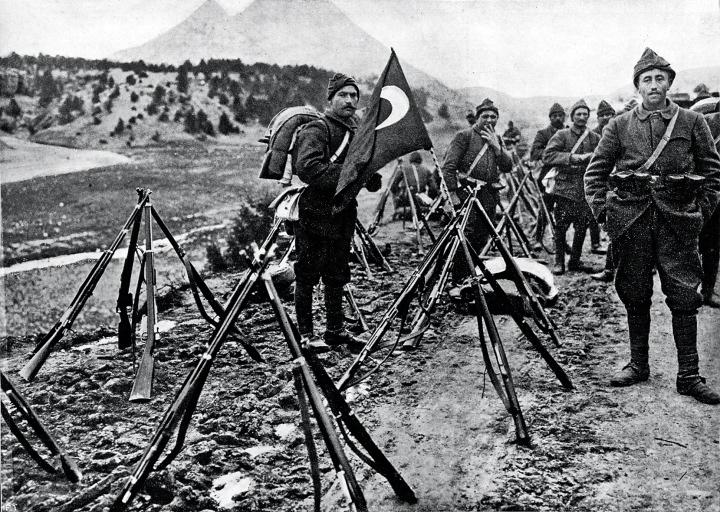 Żołnierze tureccy na półwyspie Gallipoli, 1915 r.
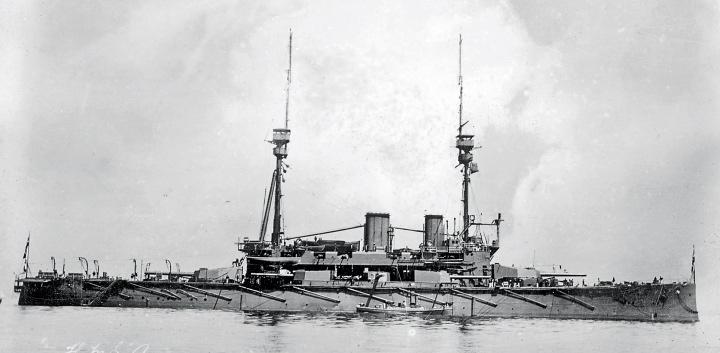 Brytyjski pancernik HMS „Agamemnon”
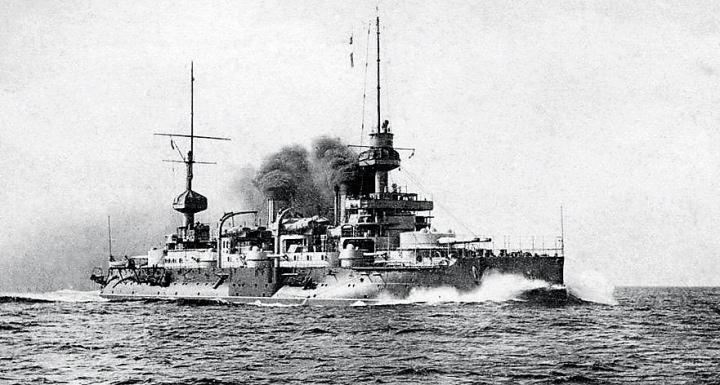 Francuski okręt liniowy „Suffren”
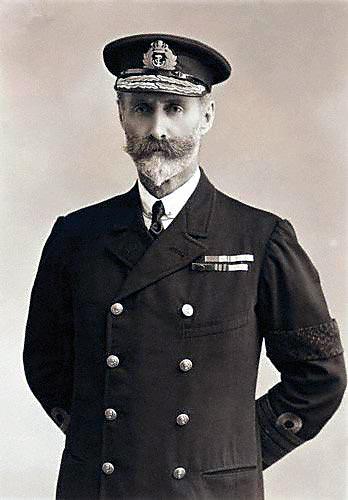 Wiceadmirał Sackville Hamilton Carden, dowódca brytyjskich sił morskich blokujących Dardanele
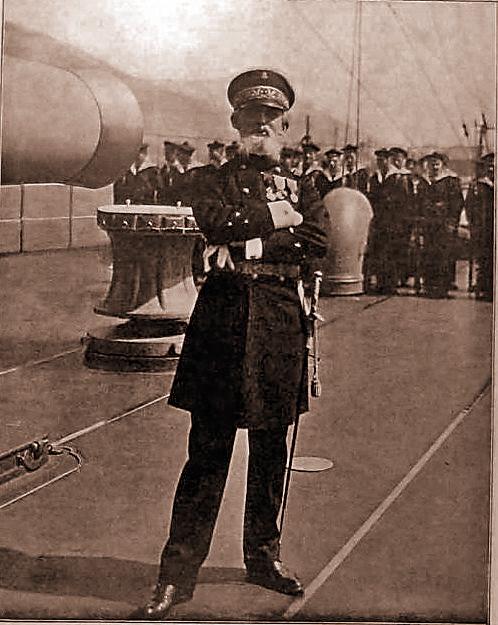 Admirał Emile Paul Amable Guepratte, dowódca okrętów francuskich operujących w rejonie Dardaneli
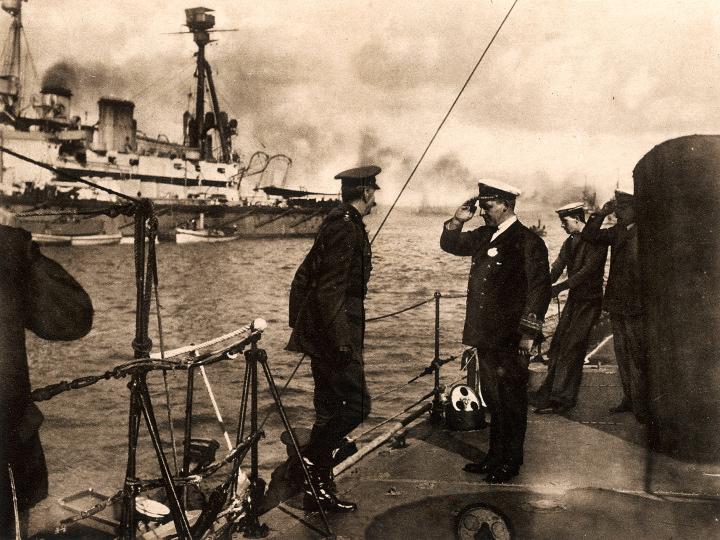 Brytyjski minister wojny lord Horatio Kitchener na pokładzie niszczyciela „Laforey”
 Marynarze na francuskim okręcie liniowym „Charlemagne” przygotowują się do otwarcia ognia
 HMS „Albion” w Dardanelach, mal. Alma Claude Burton Cull
 HMS „Cornwallis” ostrzeliwuje tureckie forty w Dardanelach
 Turecka artyleria zmusza do odwrotu aliancką flotę w Dardanelach
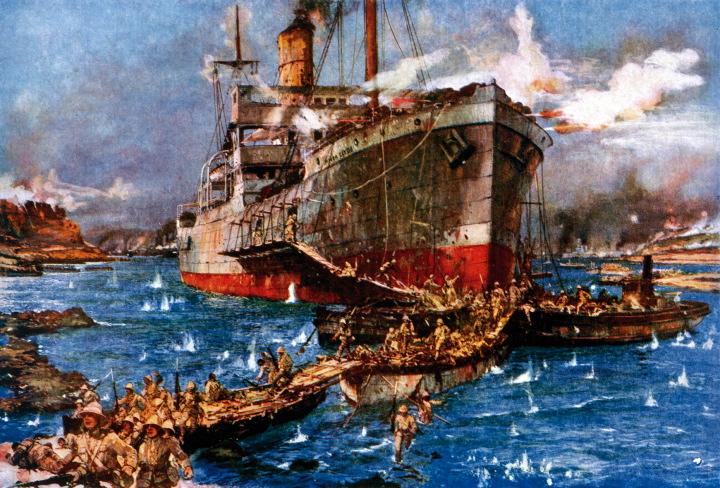 Wyładunek wojsk alianckich na przylądku Helles – na dalszym planie statek „River Clyde” osadzony przez aliantów na mieliźnie w pobliżu fortu Seddülbahir
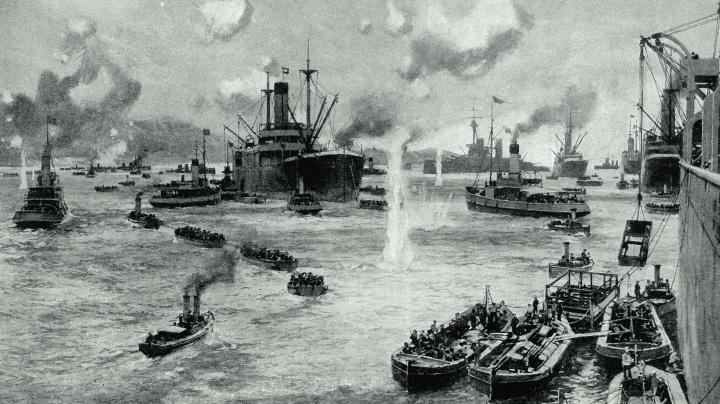
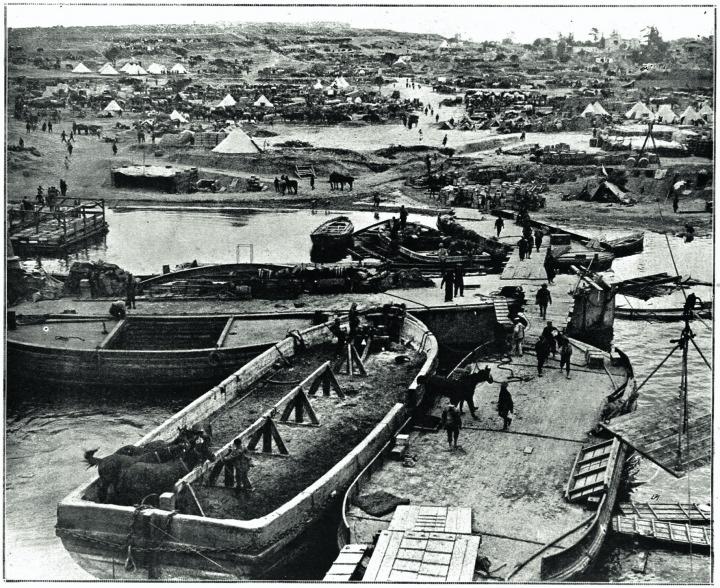
 Okręty alianckie osłaniają wyładunek wojska i sprzętu na półwyspie Gallipoli
 Artylerzyści na przyczółku ANZAC
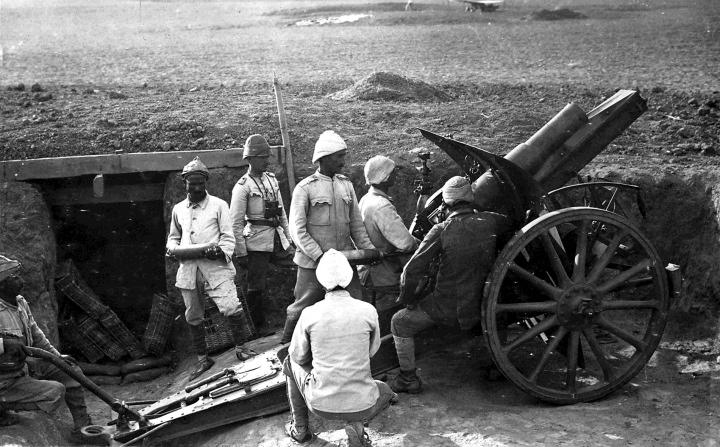 Tureccy artylerzyści przy niemieckiej haubicy kal. 105 mm
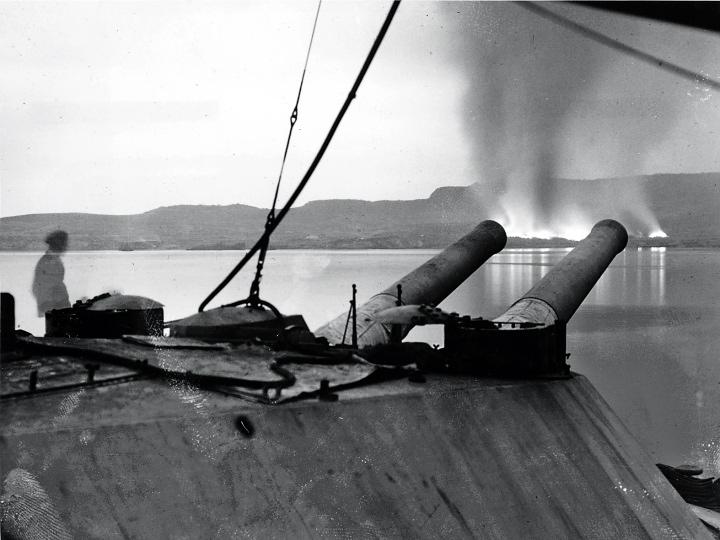 Płoną alianckie składy zaopatrzeniowe w zatoce Suvla – widok z pokładu HMS „Cornwallis”
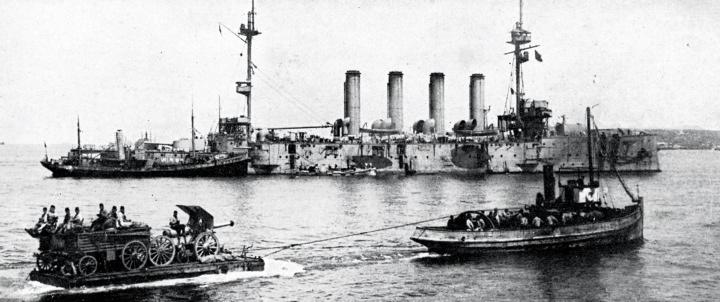
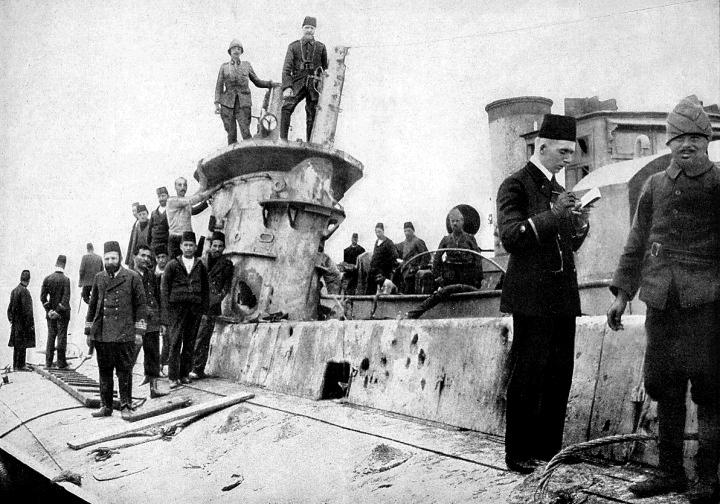 Wrak brytyjskiego okrętu podwodnego „E15” wydobyty przez Turków z Dardaneli
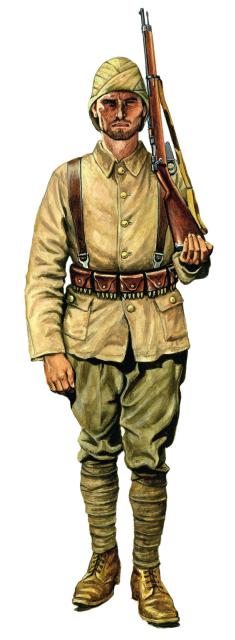
Żołnierz piechoty tureckiej uzbrojony w karabin Mauser wz. 1890
Two days before the outbreak of war, Germany and Turkey had agreed on an alliance against Russia, although this did not commit Turkey to military action. Events in the next few months, however, including the British requisitioning of two battleships built for the Turkish Navy in Britain, meant that the entry of Turkey into the war seemed increasingly likely. By September 1914, German command had been extended to the Turkish Navy, and the Bosphorus waterway had been closed in contravention of international law. Turkey was now firmly in the German camp. Following an ultimatum to the Turkish government, hostilities officially began on 31 October 1914. By early 1915, it was obvious that the war would be protracted, and that Russia was stretched fighting on two fronts. Into this context was born the plan to attack the Dardanelles.
Simply, the original plan was the forcing of the Dardanelles by a squadron of battleships, which were considered expendable. This would open the waterway for Russian ships and hopefully cause the downfall of the Turkish government. This would be followed by landings on the peninsulas. Plans developed, and a large number of powerful ships, with a force of British, French, Australian and New Zealander divisions (ANZAC forces), were allocated for the campaign.
The naval attack started on 18 March, firstly neutralizing the forts guarding the entrance of the waterway. Although this was mainly successful, the existence of mines in the waterway provoked heavy losses on the British and French ships. It now seemed that a naval attack was unlikely to succeed, and on 22 March, the plan was changed from a naval to a military operation. With hindsight, it can be seen that this diminished the chances of success, particularly as it is very possible that a renewed naval assault could have achieved victory.
From the beginning, the landings were confused, due in large part to poor intelligence and planning. Also, the necessary reorganisation of the land forces led to a month-long gap between the naval attack and landings, which not only destroyed any advantage of surprise, but gave German commanders time to strengthen and rearrange the defenders of the Gallipoli peninsula.
At dawn on 25 April 1915, the ANZACs landed (see extracts below). Five of the six beaches were secured with huge losses, and the campaign was underway. Through the heat of summer, a series of futile attacks failed to take any sites. Disease was rife, and it became clear that the Turkish soldiers were not the easy opponent they had been thought to be. Still, the ANZACs fought gallantly, famously earning the title ‘diggers’ after their digging of trenches on the beaches whilst under fire. The last great British attack, on 21 August, failed amidst scenes of horror as the undergrowth ignited, cremating hundreds of wounded men. With no further offensive possible, and no reinforcements available, recommendation was made for evacuation, which occurred on 19 December 1915 and 8 January 1916. Of some 480,000 troops sent ashore, 252,000 were killed, wounded, captured or evacuated sick.
This campaign, involving naval forces and naval aviation, as well as military forces, was heroic – but an unmitigated failure. Had it succeeded, its effect on the war would have been immense; however, the execution of the plan was unfortunately beset with ineptitude. Although the gallantry of the troops became legendary, the conduct of the expedition was unworthy of the courage of the troops that it sacrificed.
Further reading
Campaign 8: Gallipoli 1915 – Frontal Assault on Turkey details the entire doomed campaign from the original plans through to the final decision to evacuate; whilst Essential Histories 23: The First World War (4) The Mediterranean Front 1914–1923(extract below) puts the campaign into the context of the whole war.
For details of the troops that took part, Men-at-Arms 81: The British army 1914–18 includes details of the British Force sent to Gallipoli; Men-at-Arms 123: The Australian Army at War (extract below) includes details of the army that was established to support the British in World War I, and the force that was sent to the Dardanelles. Men-at-Arms 269: The Ottoman Army 1914-18 describes the enemy that the landing force were fighting, and clearly shows them to be a force to be reckoned with, as the landing force quickly discovered.
An Extract from Essential Histories 23: The First World War (4) The Mediterranean Front 1914-1923
The landings
The landings took place on the morning of 25 April. The Anzacs went ashore at first light, but were landed a mile north of the intended beach due to a strong off-shore current. Instead of a gently sloping hinterland and open country all the way to the Narrows (only five miles away across the peninsula) they were confronted with steep slopes – up which they rushed. Their impetus carried them to the heights of the Sari Bair ridge, brushing aside the resistance of Turkish detachments covering the beach; but as they arrived on the summits, blown and disorganised, they met a furious counter-attack led by Mustafa Kemal, which swept them back to the edge of the ridge. There they grimly held on, to positions that became their front line for the rest of the campaign. That night, a despondent Birdwood signalled Hamilton, afloat in the battleship Queen Elizabeth, that the situation was so confused that re-embarkation was the only solution. Hamilton ordered him to stick it out and ‘Dig, dig, dig’, unwittingly creating a legend.
At Helles on the tip of the peninsula the commander of the 29th division, Major General Hunter-Weston, had chosen to land in broad daylight, a decision for which his troops paid dearly. Coming ashore under tow in ship’s boats, rowed for the last hundred yards by bluejackets, they came under devastating fire at ‘V’ beach from the defenders. A naval aviator flying overhead was appalled to see that the water for 50 yards out from the beach was red with blood. At ‘V’ beach the landing was augmented by a ‘Trojan Horse’. The collier River Clyde had been modified, with extra ports in its sides, to beach itself and disgorge two battalions down ramps and across a bridge of boats to the shore. These troops also met withering fire as they emerged from the ship and were pinned down with the others on the shore. At ‘W’ beach on the other side of Cape Helles, only a mile away, the first battalion ashore, the Lancashire Fusiliers, fought their way off the beach through dense barbed wire, winning six Victoria Crosses in the process. Elsewhere around the Helles area the landings met little resistance, but Hunter-Weston ignored this, concentrating on reinforcing the slaughter at ‘W’ and ‘V’. By last light the 29th Division was shattered and incapable of exploiting inland. The day’s final objective, the dominating high ground of Achi Baba, five miles from the landing beaches, was never taken during the campaign.
The French landings at Kum Kale stirred up a hornet’s nest and fierce fighting took place before the troops were ferried across the straits to join their British comrades at Helles.
An extract from Men-at-Arms 123: The Australian Army at War
The Anzacs at Gallipoli
The Australian Imperial Force’s first major operation was the landing at Gallipoli on 25 April 1915. The object was to take control of the Dardanelles, the narrow strait linking the Aegean Sea with the Black Sea. Command of the expedition was given to Gen. Sir Ian Hamilton, who faced a daunting task. The Gallipoli peninsula has four sets of beaches – at Bulair at the neck, Suvla Bay, Ari Burnu and at the tip, Helles. Its mountainous spine is scarred with deep ravines and gullies.
The Australians and the New Zealanders were sent in to a dawn landing at Ari Burnu, but the first assault force, the Australian 3rd Brigade, was landed a mile too far north, at what was soon known as Anzac cove. A Turkish flare went up and soon a hail of bullets was spattering the shallows and striking sparks from stones on the beach. The boats grounded and the Australians jumped over the gunwales and splashed to the beach. Some were hit; others went in out of their depth and were dragged under by their heavy kit.
The troops faced almost perpendicular cliffs under which companies and platoons were jumbled in confusion. Junior officers quickly rallied the troops and within minutes a rough line of about six companies was clawing its way up the slopes. Some men moved far and fast. By 7am a young officer and two men had climbed three ridges and were looking down on the object of the whole operation, the Narrows, only three and a half miles away. Another party was halfway up Chunuk Bair, a dominating peak around which 50,000 men would be killed during the campaign.
As much furious fighting occurred on 25 April in the wild country around Anzac Cove as in any battle in history. No front line existed, and men landing later in the day were just as vulnerable to enemy bullets as men in the gullies inland.
Their first bayonet rush carried the Australians to a hill known as Baby 700, but incessant enemy fire made the position untenable. By nightfall the Anzacs held a position about two miles long by three-quarters of a mile deep. On Hamilton’s orders they burrowed, hacked and tunnelled into the seaward slopes of the ridges. For three days after the landing the fighting was savage, with wave after wave of Turks making frontal attacks on the Anzac lines.
By 1 May reinforcements were required. The only available forces were the Light Horse regiments in Egypt. Despite the value of the Light Horse in the defence of Egypt, the enthusiasm of the brigades to fight, even without their beloved horses, finally influenced Hamilton to employ the Light Horsemen in a dismounted role, but they served intact in their regimental and brigade groups.
The only grenades the Anzacs had were jam tins filled with explosive, nails, stones, pieces of glass and shell shards, so they became adept at catching the Turkish ‘cricket-ball’ grenades and throwing them back.
On the night of 18-19 May the Turks put 42,000 men into a massive attack on the Anzac position, where Gen. Birdwood had only 12,500 front line men. They killed thousands of Turks in the attack, and the first hour was sheer slaughter. At daybreak the Turkish officers gave up all efforts to lead, and drove their men into the Anzac fire. Australian reserves came pushing into the line, even offering to pay other men to make room for a place on the parapet. Later in the campaign Anzacs offered as much as £5 for the ‘privilege’ of getting an unofficial place in a bayonet charge. When the Turks broke off the action at midday they had lost 10,000 men; 5,000 of these, dead and wounded, lay in the open in No Man’s Land.
The Australians’ physical appearance impressed all visitors to Anzac. Compton Mackenzie, the novelist, then on HQ staff, wrote: ‘They were glorious young men. Their almost complete nudity, their tallness and majestic simplicity of line, their rose-brown flesh burnt by the sun and purged of all grossness by the ordeal through which they were passing, all these united to create something as near to absolute beauty as I shall hope ever to see in this world.’
But even ‘glorious young men’ are mortal. In fighting at Lone Pine, in August, six Australian battalions lost 80 officers and 2,197 men. Battalions of the 1st Brigade lost most heavily, and few witnesses of outstanding bravery remained. Consequently, of the seven Victoria Crosses awarded after this fight, four went to a reinforcing battalion, the 7th. In that fierce month two Light Horse units, the 8th and 10th, were practically wiped out.
Nowhere on the peninsula could the British and French make any significant progress; and eventually evacuation became inevitable. At Anzac Cove it was brilliantly planned by Lieut. Col. Brudenell White of the Anzac Staff. More than 83,000 men with horses, guns and some supplies were moved out in the period 10-19 December, with only two soldiers wounded in the final stages of the evacuation. The Australians left behind 7,594 killed; Gallipoli had cost them an additional 19,367 wounded.
No comments:
Post a Comment